
Suggested articles
Manage Students in Seemi CRM
This guide explains how to view, filter, sort, and organize students in Seemi CRM. It includes steps for adding new students, assigning group tags, editing profiles, managing tutors, updating attendance, and controlling portal access.
Step 1: Viewing Students
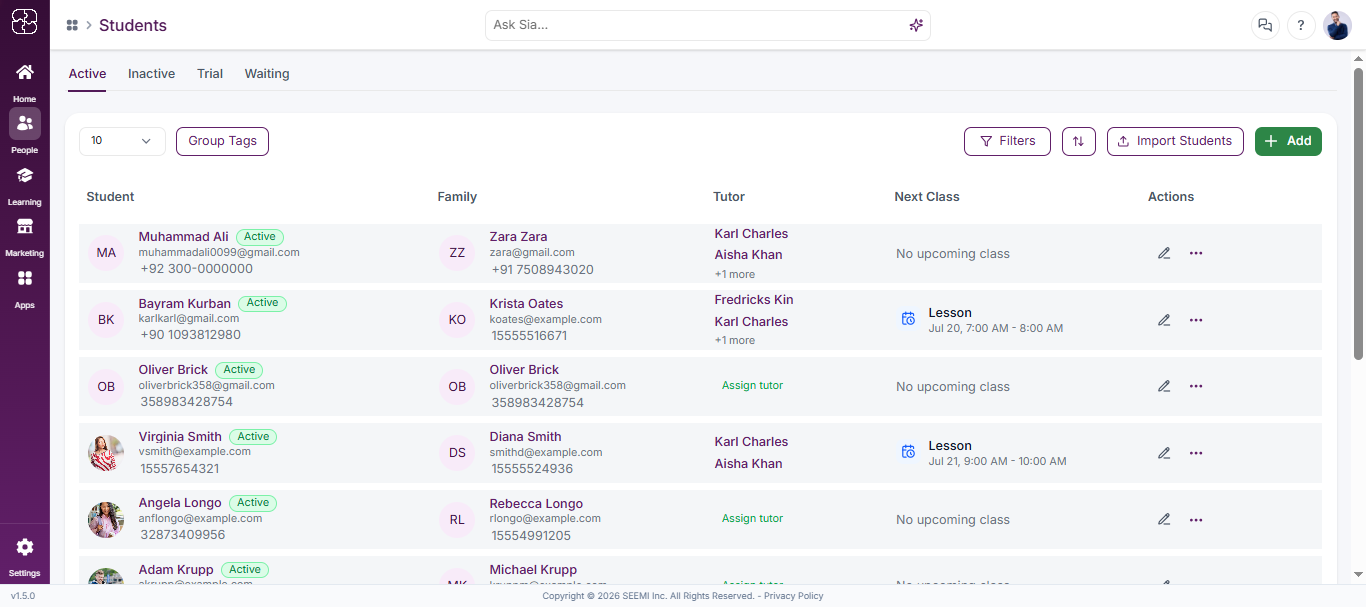
- From the left sidebar, click People, then select Students.
- By default, you’ll see the Active tab. Other tabs available: Inactive, Trial, Waiting.
- Each student row includes:
- Student Name, Email, Phone, Status
- Family Name, Email, Phone
- Tutor (or “Assign tutor”)
- Next Class (date/time or “No upcoming class”)
Step 2: Using Filters
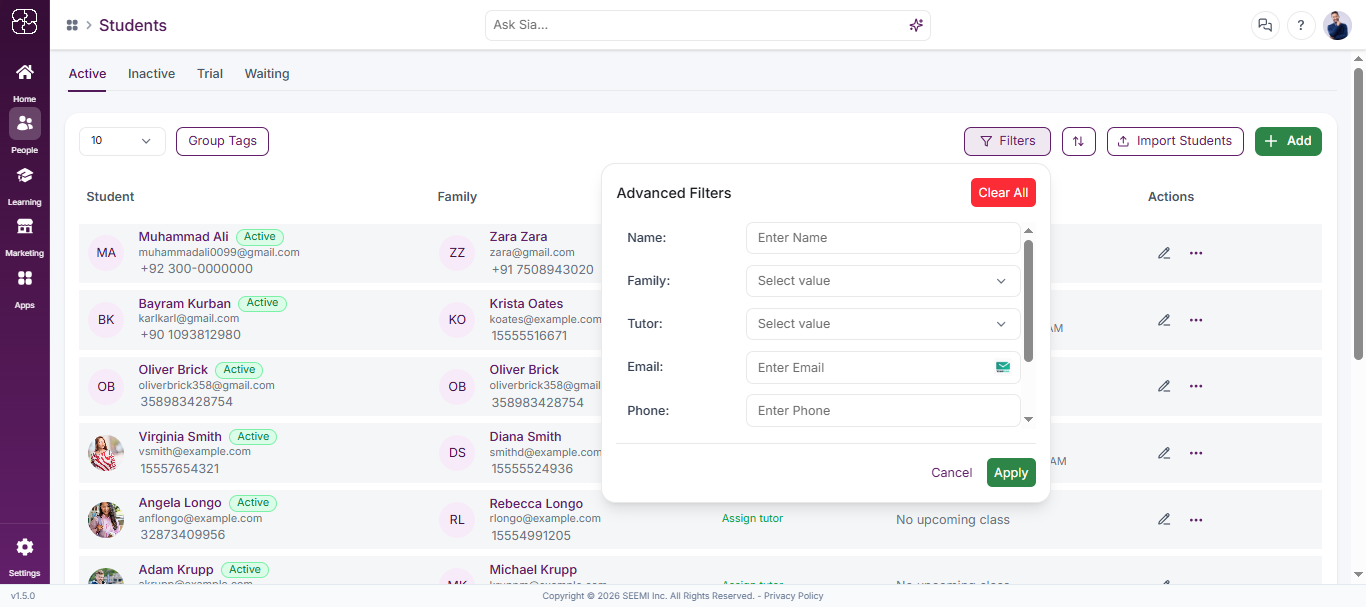
- Click the Filters button to open Advanced Filters.
- You can filter by:
- Name, Family, Tutor
- Email, Phone
- Click Clear All to reset filters, or Apply to run the filter.
Step 3: Sorting Students
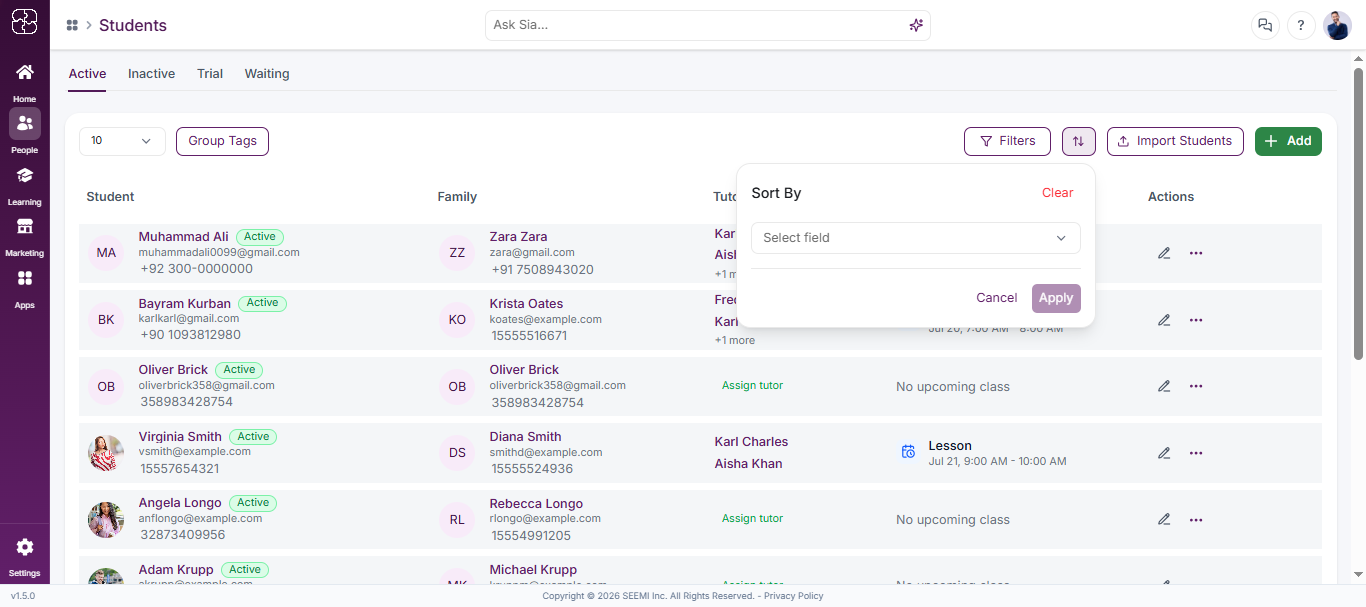
- Click the sort icon (⇅) next to Filters to open Sort By.
- Select a field from the dropdown.
- Click Apply to sort the list, or Clear to reset.
Step 4: Adjusting View
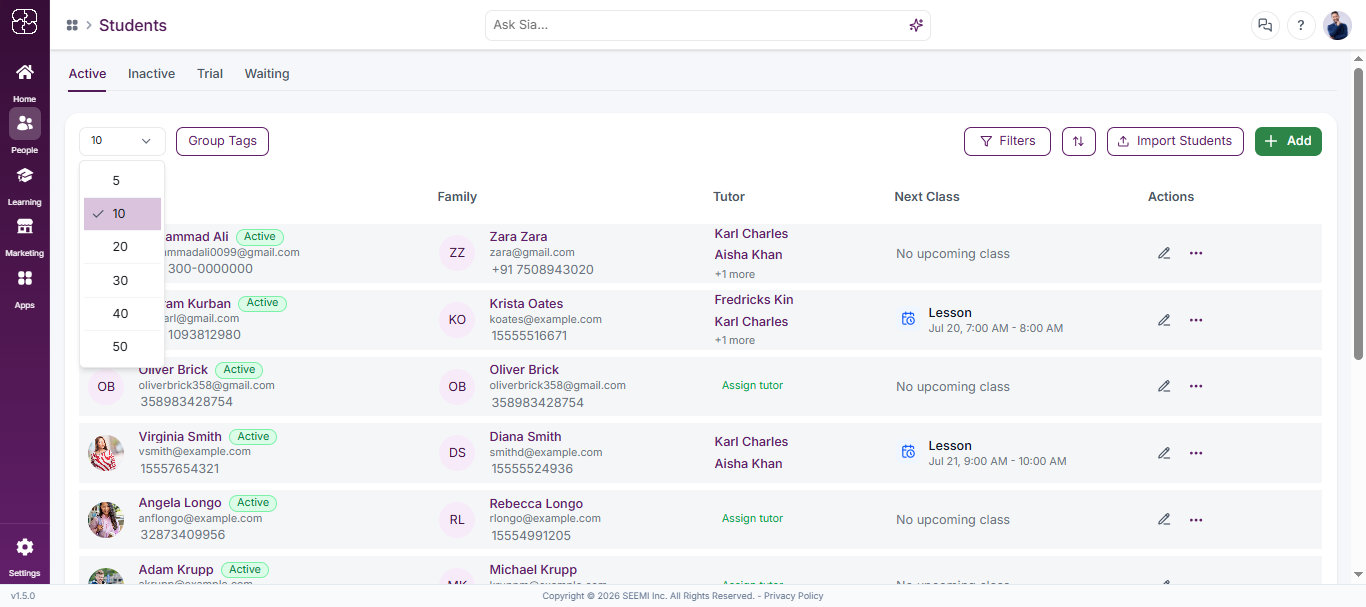
- Use the dropdown at the top-left to select how many entries to show per page (5–50).
- Switch between Active, Inactive, Trial, and Waiting tabs as needed.
Step 5: Using Group Tags
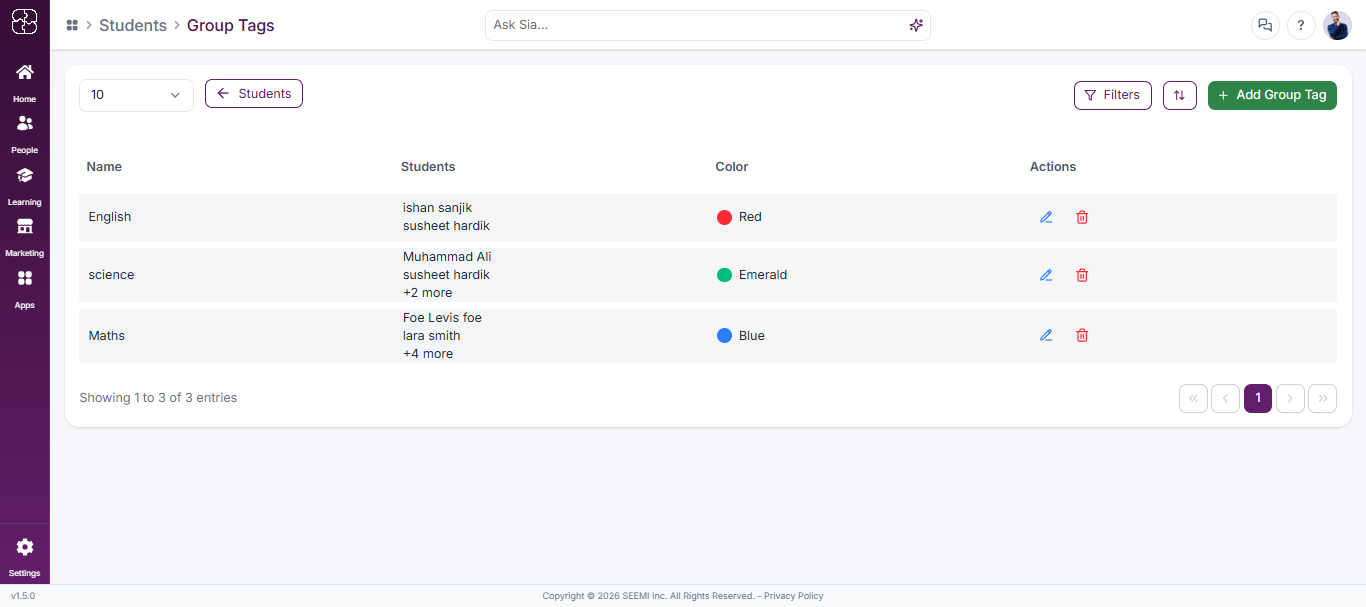
- Click Group Tags next to the entry count dropdown.
- See all existing tags with:
- Name, Students assigned, Color
- Use the edit (pencil) or delete (trash) icons under Actions to manage a tag.
- Click ← Students to return to the main student list.
Step 6: Adding a Group Tag
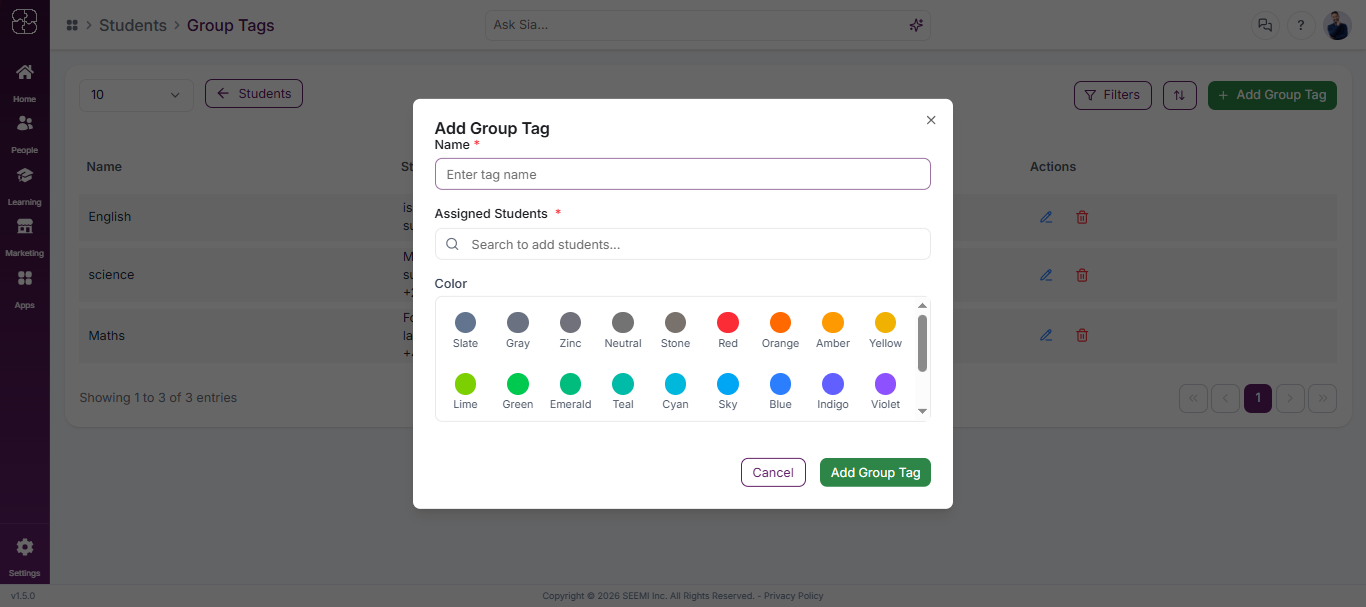
- From the Group Tags screen, click + Add Group Tag.
- Enter:
- Tag Name
- Assigned Students (search and select)
- Color
- Click Add Group Tag to save.
Step 7: Adding a New Student
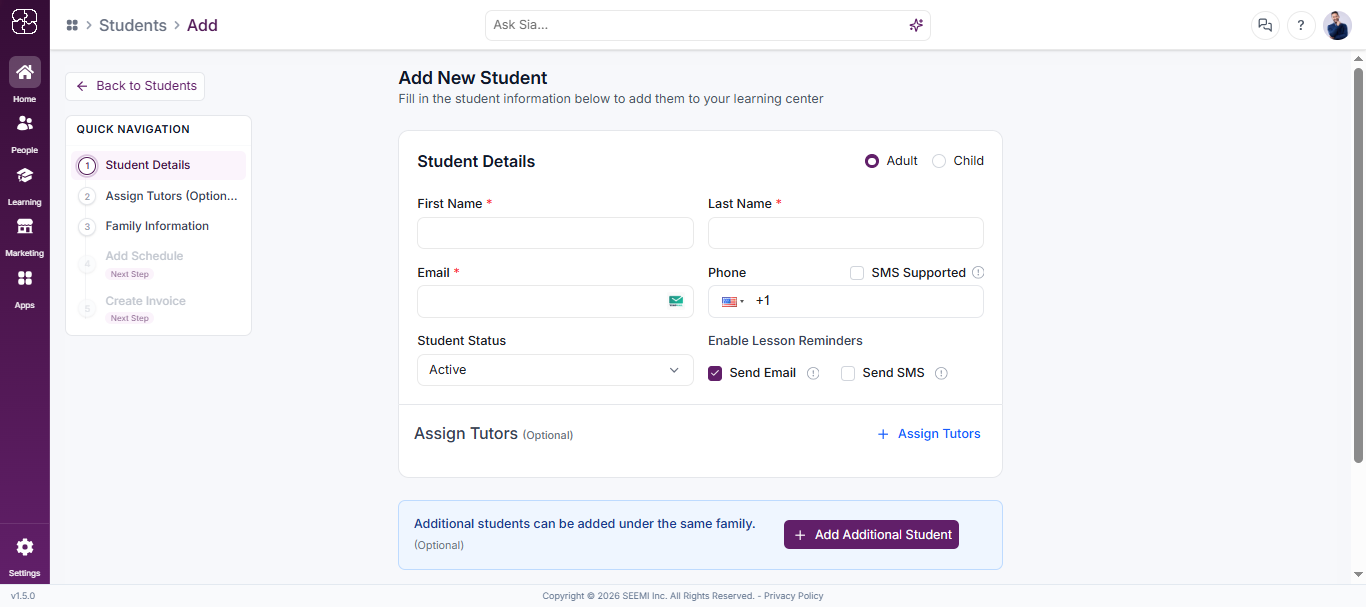
- Click + Add on the Students page.
- Choose Adult or Child at the top of the form.
- Fill in Student Details:
- First Name, Last Name (required)
- Email (required), Phone
- Student Status (e.g., Active)
- Enable Lesson Reminders — Send Email and/or Send SMS
- Optionally click + Assign Tutors to assign a tutor at this stage.
- Optionally click + Add Additional Student to add more students under the same family.
- Under Family Information, choose Existing or New family.
- Click Add Student to save.
Viewing an Individual Student Profile
Click on a student’s name (from the Students list or a Family profile) to open their detailed profile.
Step 8: Student Profile Tabs Overview
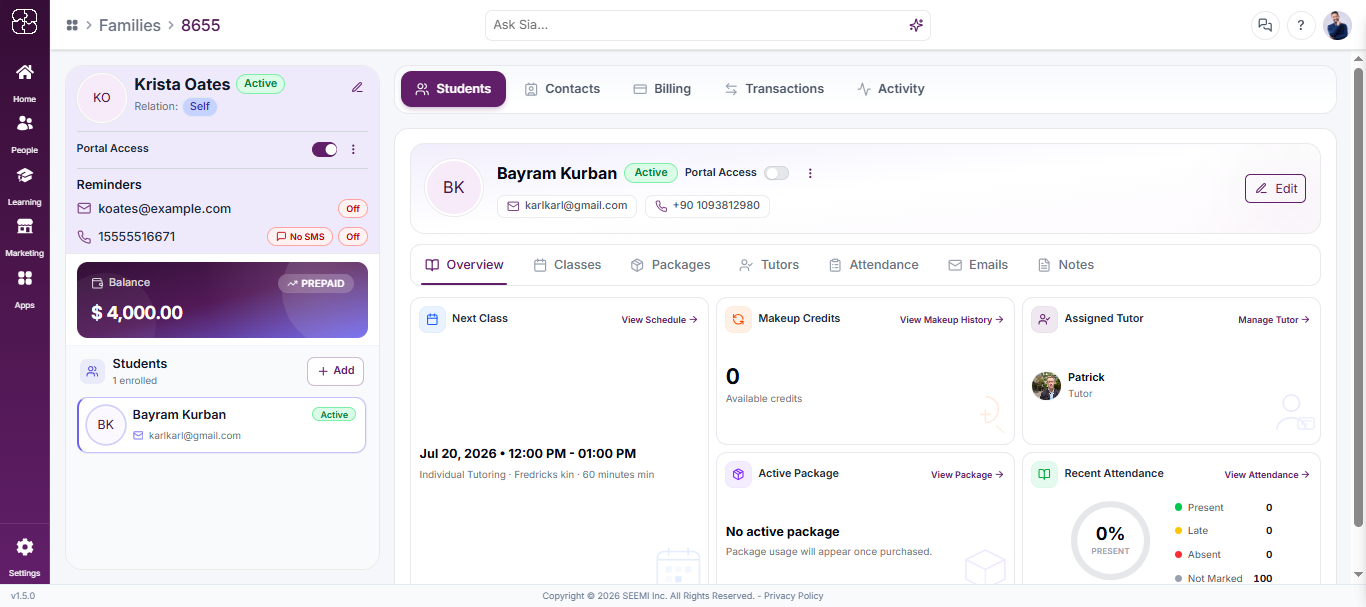
- Overview — Next Class, Makeup Credits, Assigned Tutor, Active Package, Recent Attendance summary
- Classes — Full class schedule and history, with an Open calendar view link
- Packages — Packages History (name, price, type, usage, expiry, status, auto renewal, invoice)
- Tutors — Assigned and Unassigned tutors
- Attendance — Attendance Overview and detailed session log
- Emails — Email history with the student/family, and a Compose option
- Notes — Internal notes related to the student
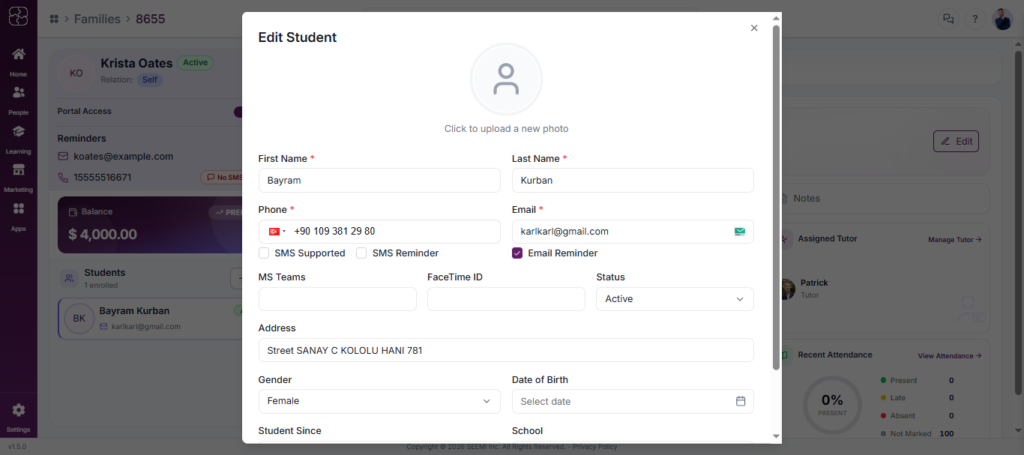
Step 9: Editing Student Details
- Click Edit at the top of the student’s profile.
- In the Edit Student window, update fields such as:
- First Name, Last Name, Phone, Email
- SMS Supported, SMS Reminder, Email Reminder
- MS Teams, FaceTime ID
- Status, Address, Gender, Date of Birth
- Student Since, School
- Click Update to save, or Cancel to discard changes.
Step 10: Family Contacts Tab
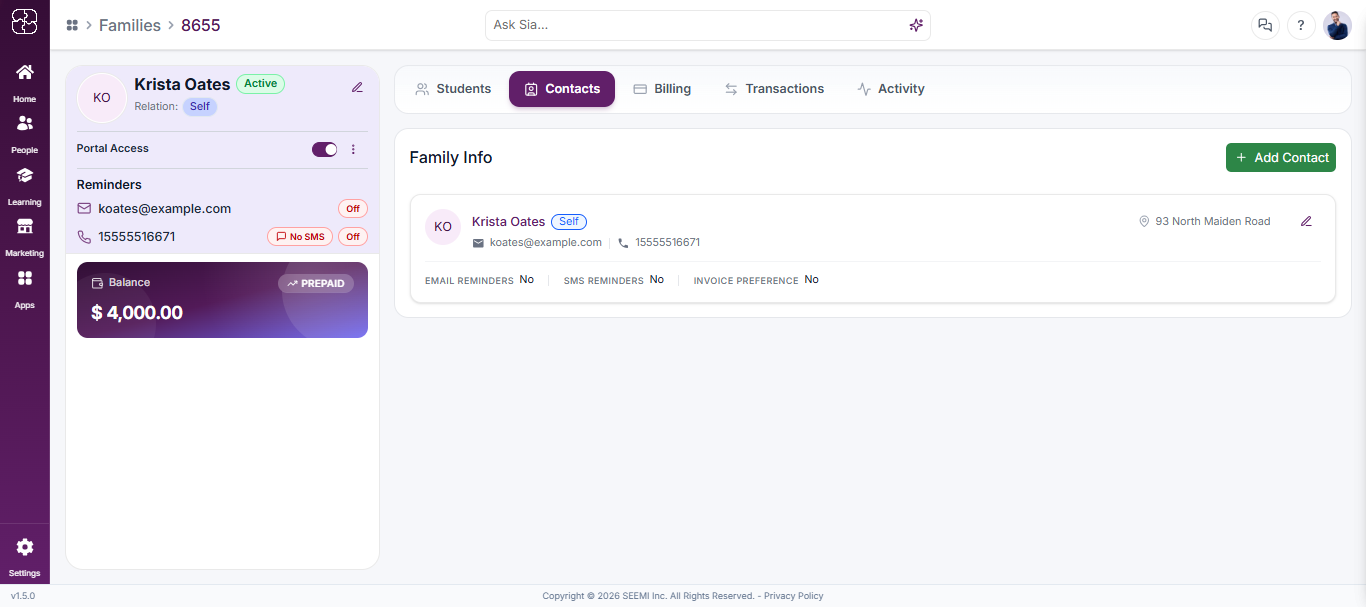
Within the Family profile (accessible via People → Families, or from a linked student), click the Contacts tab to:
- View family contact details: name, relation (e.g., Mother), email, phone, location
- Check communication preferences: Email Reminders, SMS Reminders, Invoice Preference
- Click + Add Contact to add a new contact, or the pencil icon to edit an existing one
Step 11: Managing Tutors
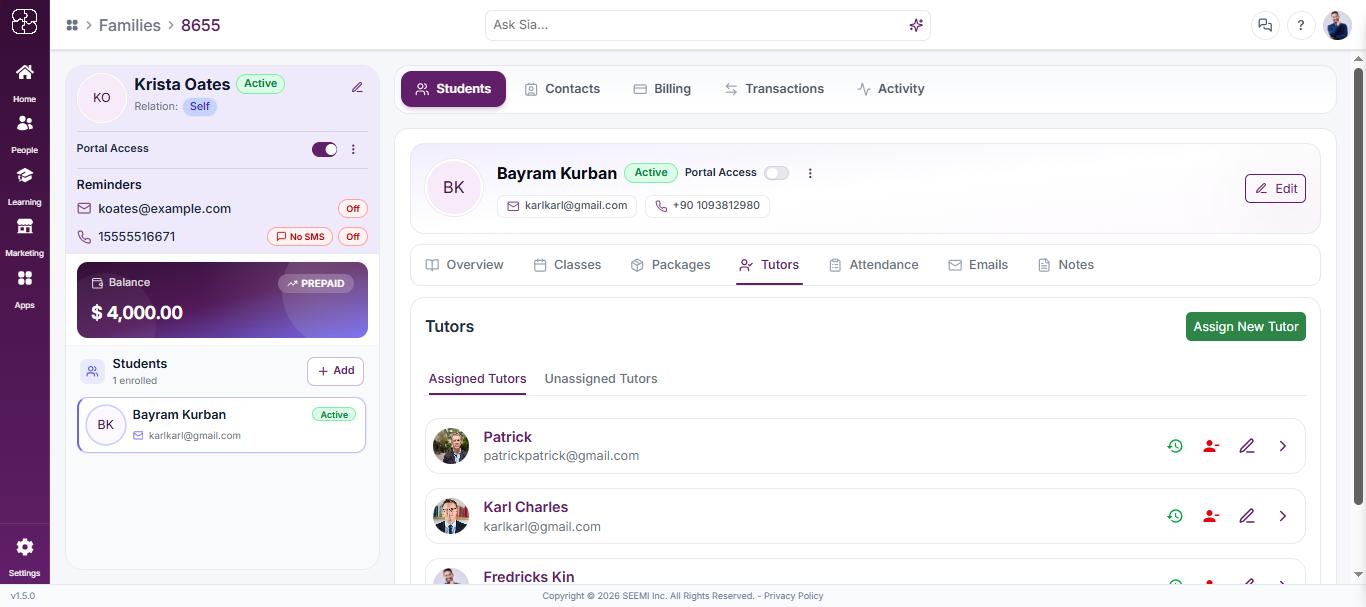
Under the Tutors tab on a student’s profile:
- View Assigned Tutors and Unassigned Tutors.
- Click Assign New Tutor to add one.
- Use the quick-action icons (history, unassign, edit) next to each tutor to manage the assignment.
Step 12: Managing Portal Access
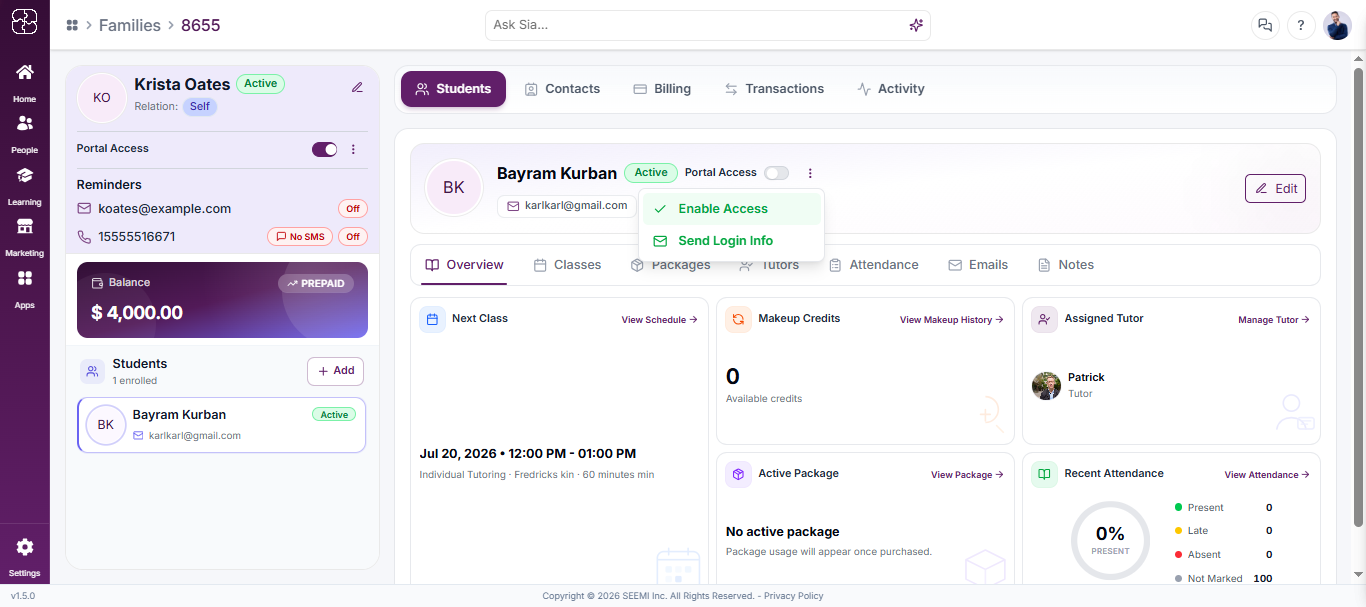
- On the family profile sidebar, use the Portal Access toggle to enable/disable the parent’s access.
- On the individual student’s profile, use the Portal Access toggle next to their name to enable/disable the student’s own access.
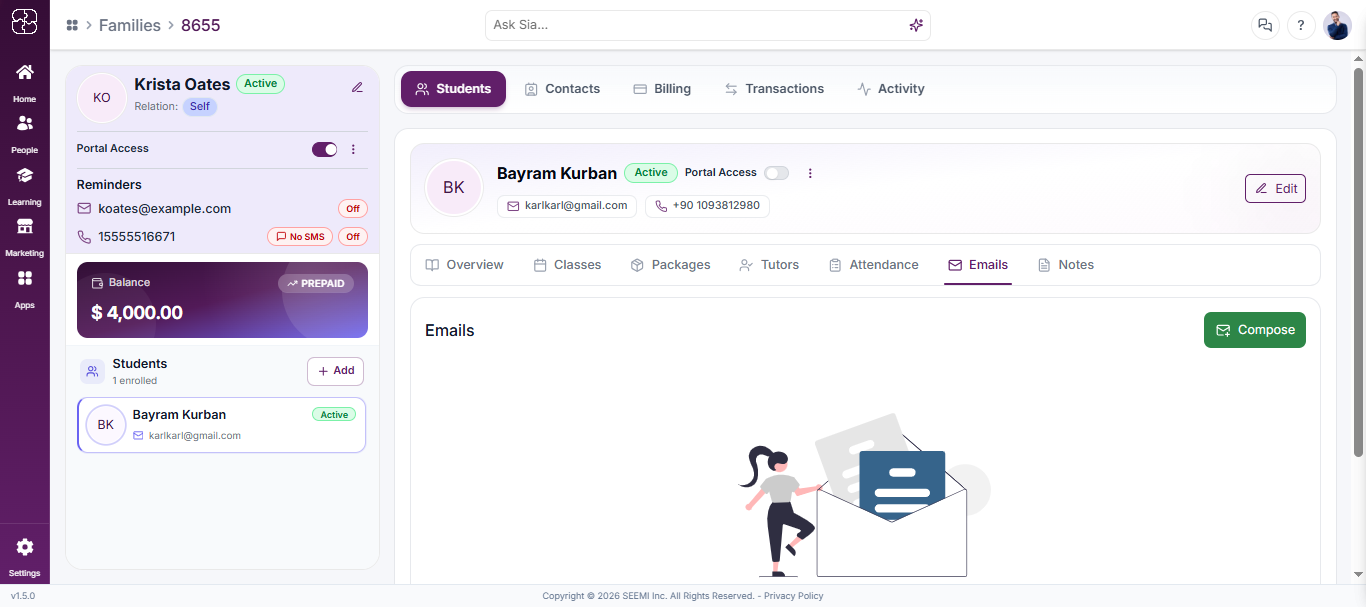
Step 13: Emails Tab
- Open the Emails tab on a student’s profile to view email history.
- Click Compose to send a new email — fill in the subject and message, then click Send.
- If no emails exist, the tab shows “No emails recorded for this student.”
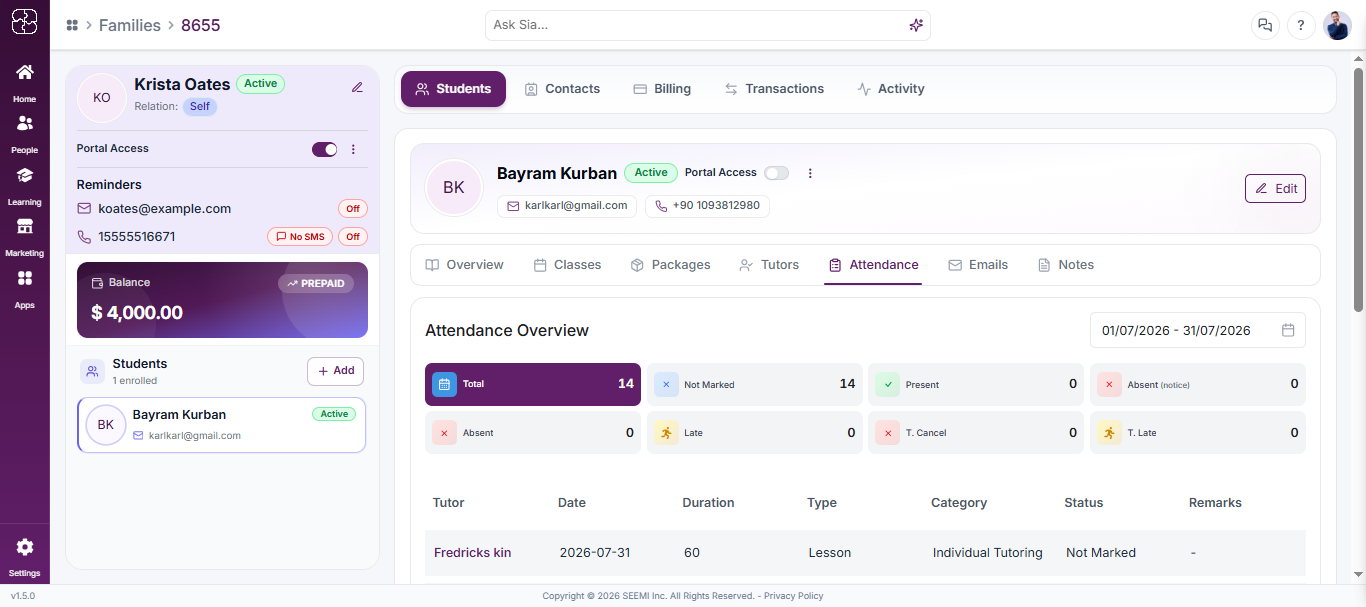
Step 14: Attendance Tab
- Open the Attendance tab to see the Attendance Overview for a selected date range: Total, Not Marked, Present, Absent (notice), Absent, Late, T. Cancel, T. Late.
- Below this, a detailed log lists each session by date, duration, type, category, status, and remarks.
- If no data exists, the tab shows “No attendance data found.”
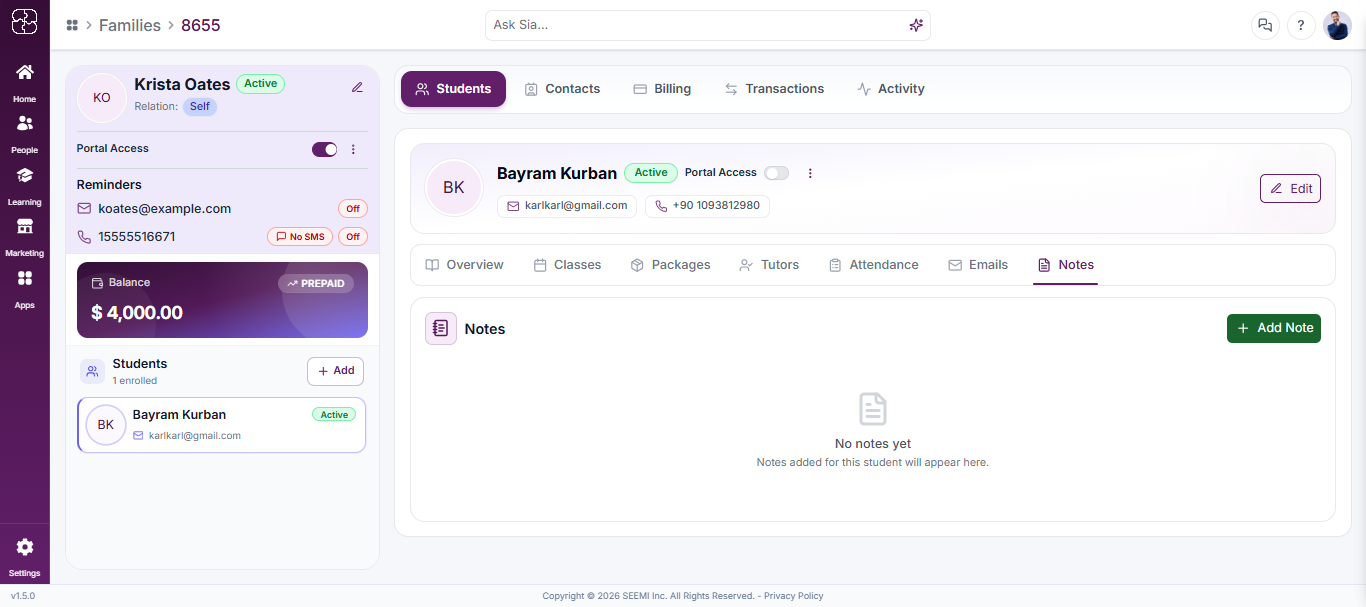
Step 15: Notes Tab
- Open the Notes tab to view notes linked to the student.
- Click + Add Note to create one. If none exist, it shows “No notes yet.”
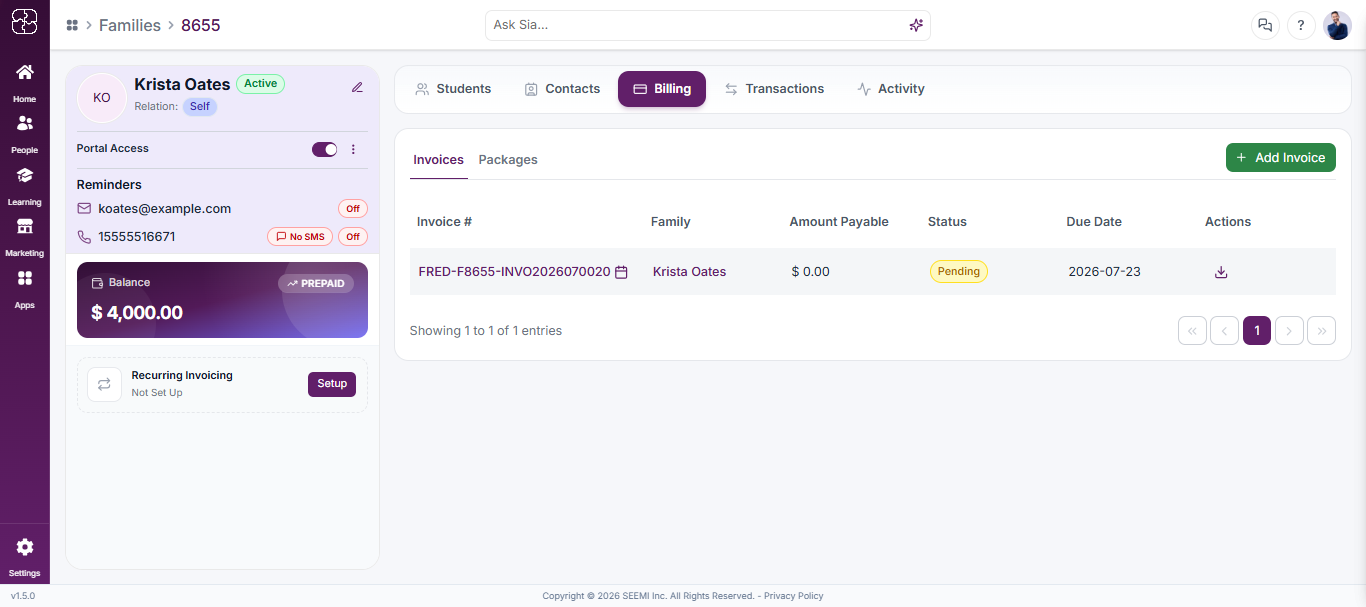
Step 16: Family Billing (Invoices & Packages)
From the family profile, click the Billing tab to:
- View Invoices — Invoice #, Family, Amount Payable, Status, Due Date. Click + Add Invoice to create a new one (Single or Recurring).
- Switch to the Packages sub-tab to manage packages at the family level.
- Set up Recurring Invoicing via the Setup button if not already configured.
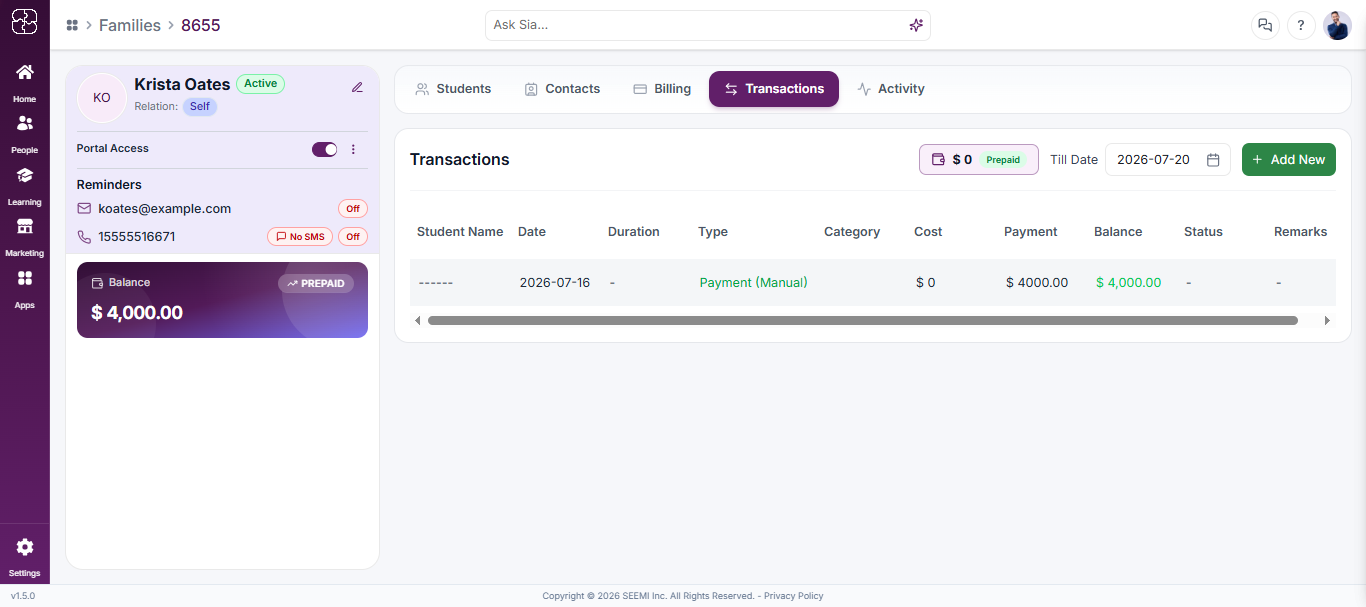
Step 17: Family Transactions
Click the Transactions tab on the family profile to view a full transaction log, including:
- Student Name, Date, Duration, Type, Category, Cost, Payment, Balance, Status, Remarks
- Current prepaid balance and a + Add New button to log a new transaction
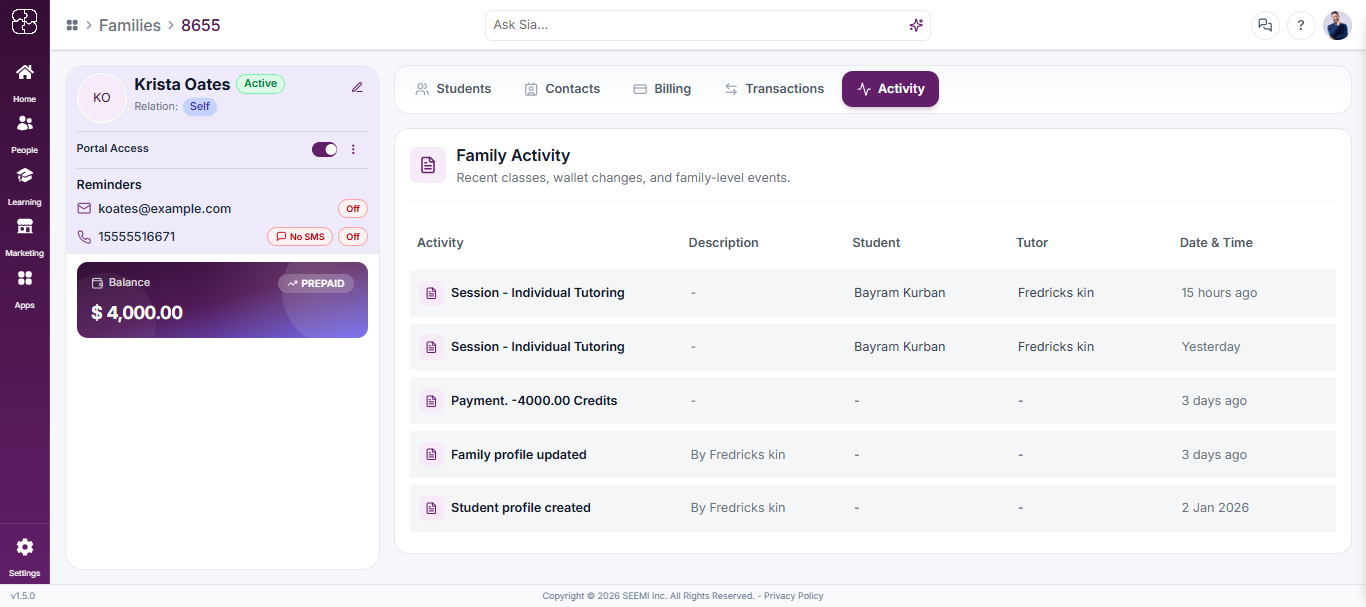
Step 18: Family Activity Log
Click the Activity tab to view a chronological log of family-level events, including:
- Activity type (e.g., Session, Student profile created)
- Description, Student, Tutor, and Date & Time
Additional Contact Information Sidebar
On both the family and individual student profile, the left/top sidebar displays:
- Portal Access toggle
- Reminders — email and phone, with On/Off status for SMS
- Balance (Owing or Prepaid)
- Linked Students panel (on family profiles) with quick status indicators
Common Questions
Go to the Students section from the left sidebar to see all active students. You can use the Filters option to narrow results by name, tutor, family, or contact details and click Clear All to reset filters anytime.
Click + Add Student, fill in personal and additional details such as name, email, phone, and school, then define their status and family association. Choose between an existing or new family before saving.
Group Tags help organize students into specific categories for easy tracking. You can add a new tag by entering its name, assigning students, selecting a color, and linking a teacher if needed.
In the My Tutors tab of the student profile, click Assign New Tutor to select a tutor, lesson details, billing method, and price. You can also unassigned a tutor at any time from the same section.
Open the Portal tab in the student’s profile. Use the toggles to enable or disable Student Access and Parent Access as needed for login and communication permissions.
Yes. Go to the Attendance & Notes tab to view attendance summaries, track absences, and record notes for each session. You can sort attendance by date for easier review.