
Suggested articles
How to Change Business Information
Step 1: Go to Settings
Log into your Seemi CRM account.
Click on your profile (top-right corner) and select Settings from the dropdown.

Step 2: Open Business Settings
Log into your Seemi CRM account.
Click on your profile (top-right corner) and select Settings from the dropdown.
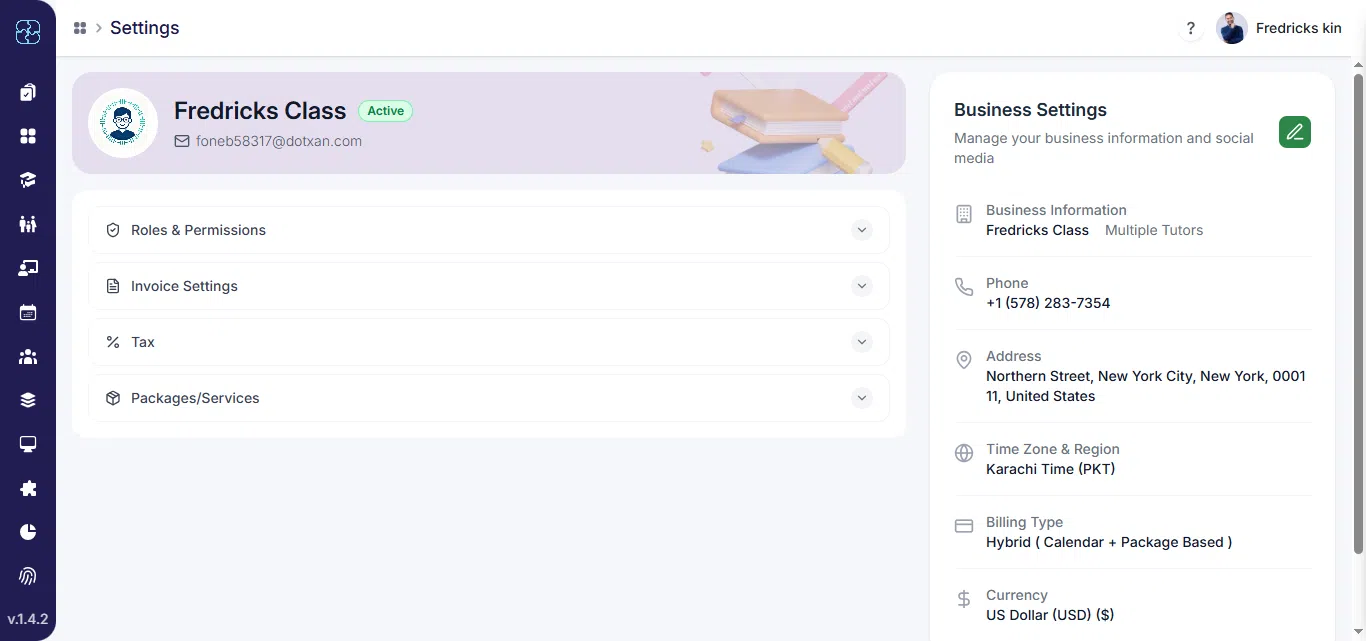
Step 3: Update Business Profile Info
The business profile will open in a modal. You can update the following fields:
Business Logo – Click or drag to upload your logo.
Business Name – Enter or update your business name.
Business Size – Choose from options like “Single Tutor”, “Multiple Tutors”, etc.
Email – Make sure the email is correct.
Phone – Enter your business phone number for contact purposes.
Billing Type – Select your billing method like “Calendar-Based, Package-Based, or Hybrid.”
Address – Add or update your business address.
Time zone – Select your time zone from the dropdown (required).
Currency – Choose your business currency (required).
Social Media – Enter your business links for:
Facebook
Twitter
Instagram

Common Questions
Log into your account, click your profile icon at the top-right corner, and select Settings. Then, go to Business Settings to view or edit your business details.
You can update your business name, logo, email, phone number, address, billing type, currency, time zone, and social media links like Facebook and Instagram.
Open Business Settings, click on the logo upload area, and either drag and drop your new logo or select it manually from your computer.
Yes. Both time zone and currency can be updated under Business Settings. Make sure to click Save Changes after editing to apply updates.
Ensure all required fields (like time zone and currency) are filled correctly. If the issue continues, try refreshing the page or contact Seemi support for help.