
Suggested articles
How to Assign a Package to a Student
Assigning a package links it to a student account so sessions are available to redeem and tracked in usage reports.
Step 1: Open the Family Profile
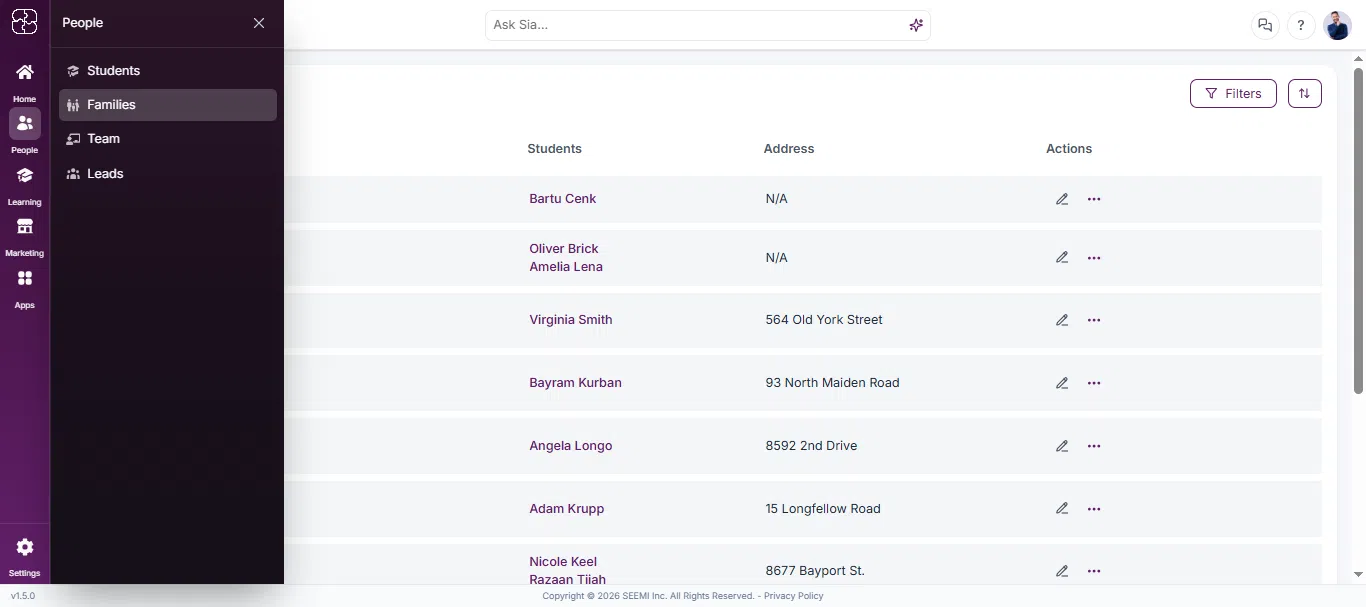
- From the left sidebar, click People, then select Families.
- Select the family profile to which you want to assign a package.

Step 2: Go to the Billing Tab
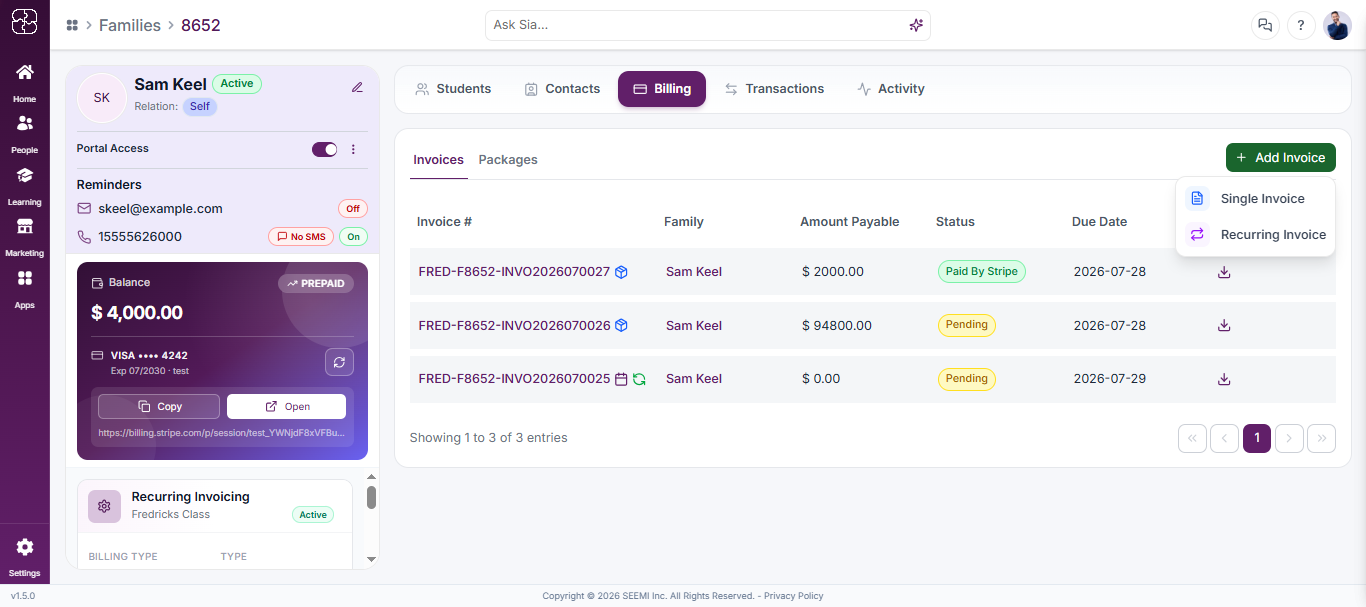
- Inside the family profile, click the Billing tab.
- Under the Invoices sub-tab, click + Add Invoice.
Step 3: Choose Billing Method
In the Add Invoice window, under Step 1 – Choose billing method, select Package:
- “Assign a package to a student and create the package invoice.”
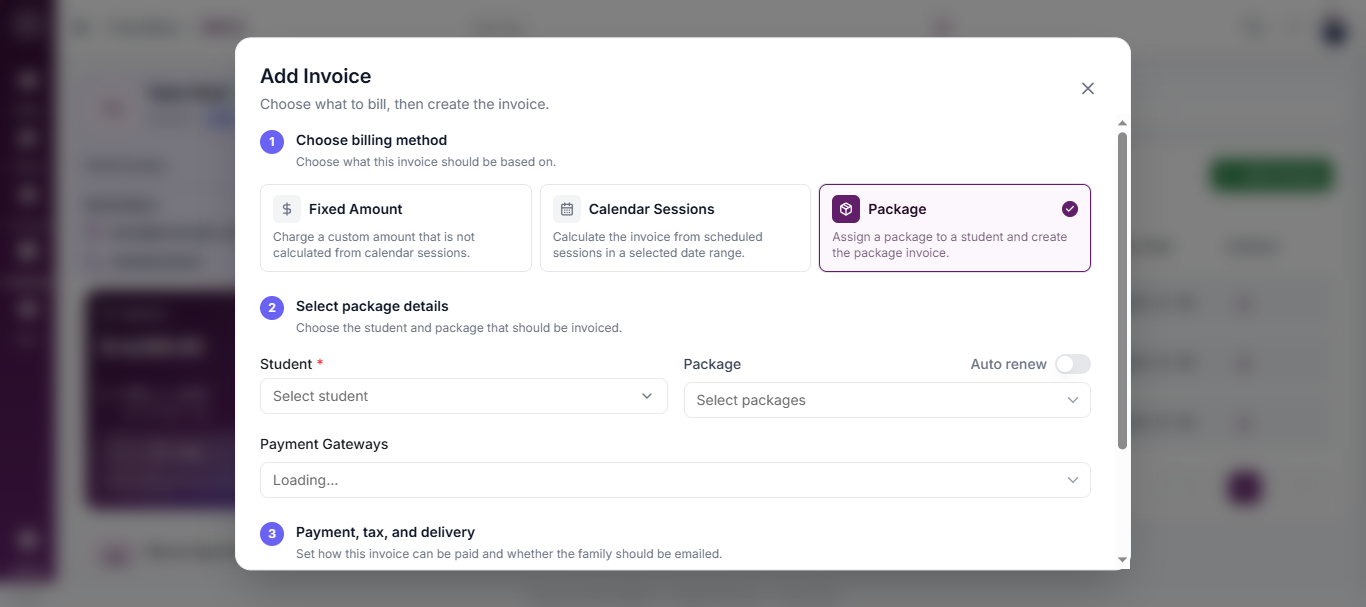
Under Step 2 – Select package details:
- Choose the Student from the dropdown.
- Choose the Package from the dropdown (the system may briefly show “Loading students and packages…”).
- Toggle Auto renew on if the package should renew automatically.
Optionally select a Payment Gateway by typing to search.
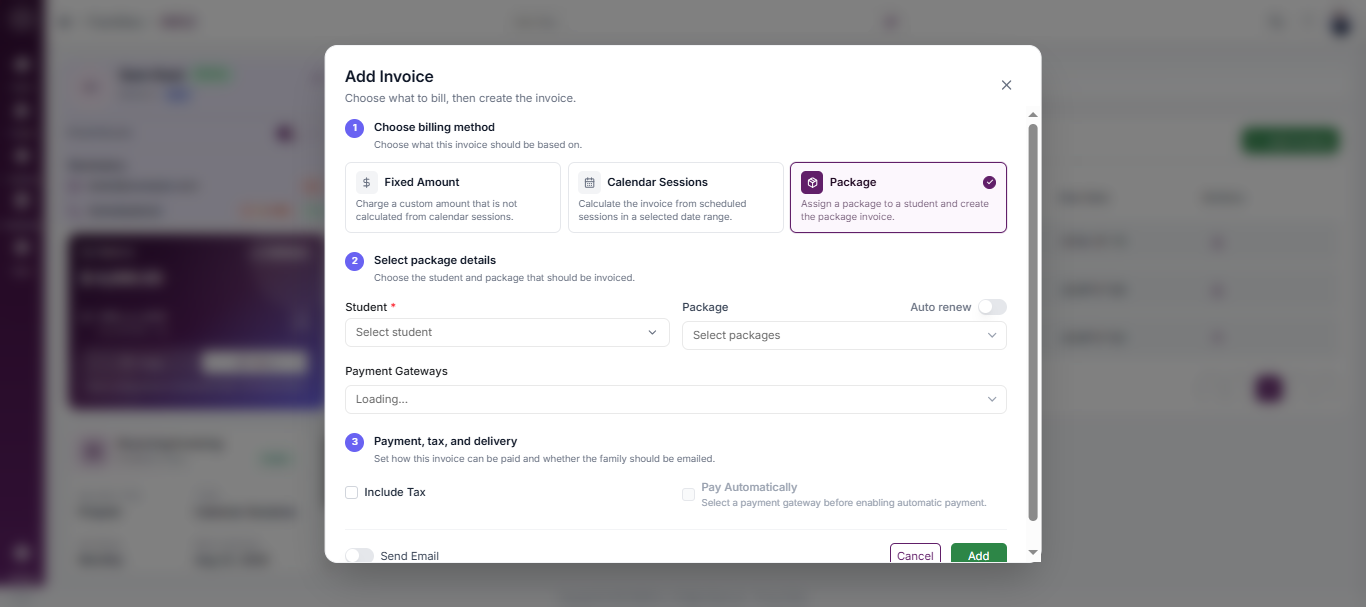
Under Step 3 – Payment, tax, and delivery:
- Check Include Tax if applicable.
- Toggle Pay Automatically if the family has a saved payment method (this stays disabled until a payment gateway is selected).
- Toggle Send Email if the family should be notified of the invoice.
Step 4: Finalize Assignment
- Click Add to generate the invoice and assign the package.
- The assigned package will now:
- Appear in the Invoices sub-tab as part of the created invoice.
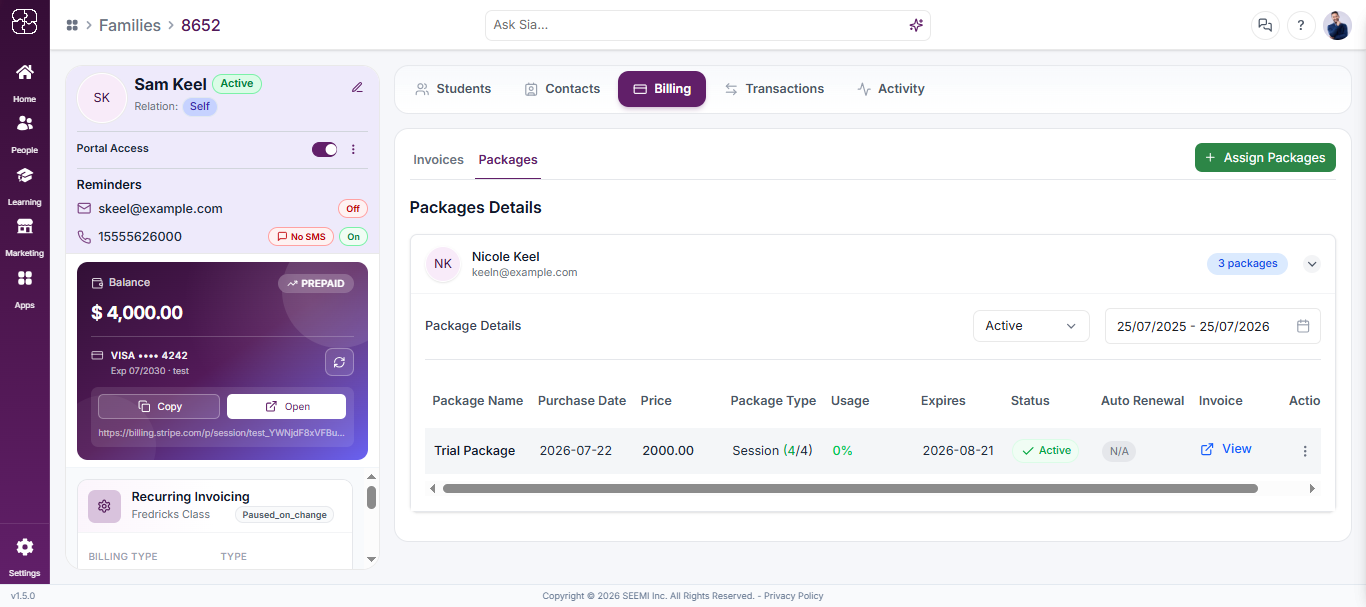
- Automatically show in the Packages sub-tab for session usage tracking.
Common Questions
Where can I assign a package to a student?
Go to Families from the left menu, open the desired family profile, and navigate to the Invoices tab to assign a package.
What invoice type should I choose when assigning a package?
Select Assign Package as the invoice type when adding a new invoice for the student.
Can I include taxes or send an email while assigning a package?
Yes. You can toggle Include Tax and Send Email before clicking Add to complete the process.
How do I confirm that the package has been assigned successfully?
Once added, the package will appear in both the Invoices and Packages tabs of the family profile for tracking and usage.