
Attendance Module User Guide
Step 1: Accessing the Attendance Module
From the left-hand navigation menu:
Click Reports > Attendance
You’ll land on a dashboard with attendance analytics and logs

Step 2: Understanding the Attendance Dashboard
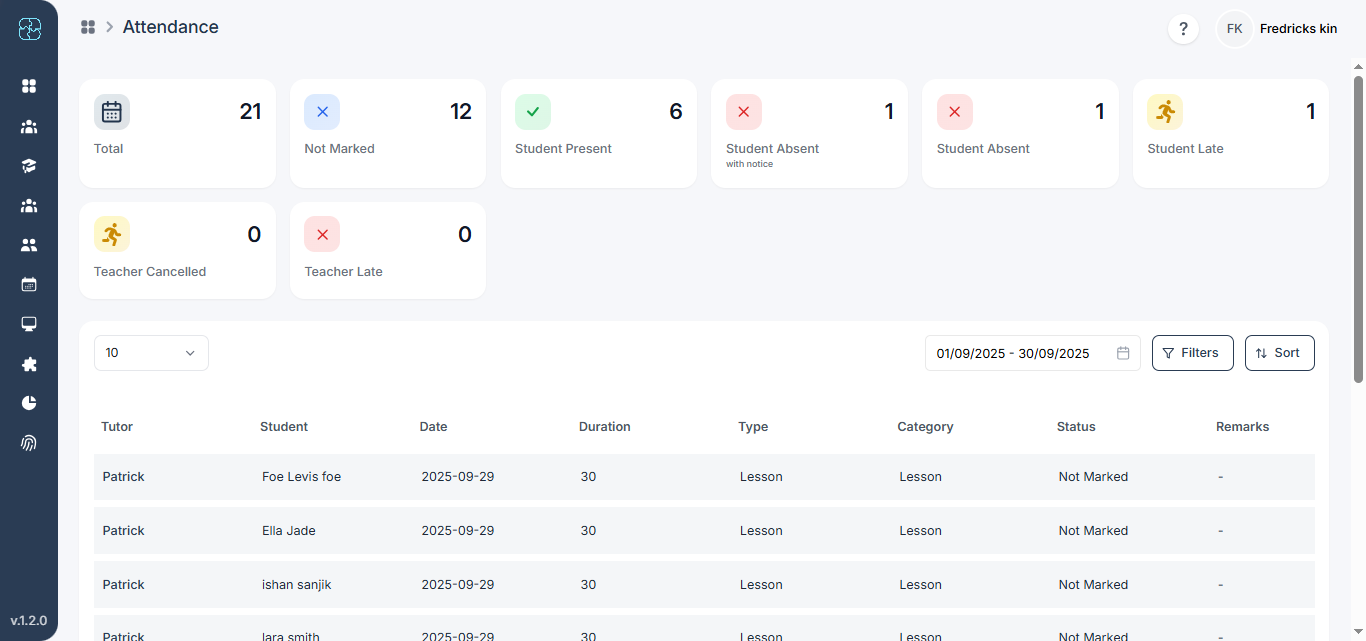
Top Summary Widgets:
Total: Number of total sessions
Not Marked: Sessions without attendance status
Student Present / Absent / Late
Teacher Cancelled / Late
This offers a bird’s-eye view of participation.
Step 3: Filtering Attendance Records
Click Filters to narrow down records by:
Employee Name
Student Name
Duration (Minutes)
Type (e.g., Lesson)
Attendance Status (e.g., Present, Absent, Late)
This is helpful for analyzing specific employee/student behaviors.

Step 4: Sorting Attendance Records
Click Sort and choose to sort by:
Date
Student Name
Employee Name
Duration
Type
Status
Choose Ascending or Descending for the desired view.

Step 5: Reviewing Individual Attendance Records
Below the filters, you’ll see a list with these columns:
Tutor: Who held the session
Student: Who attended
Date
Duration
Type: Usually “Lesson”
Category: Specific type like “Group Lesson”
Status: Whether marked present/absent/etc.
Note: Additional remarks

Common Questions
If a session was missed, open the Attendance list, click the session record, and select the correct attendance status. Save the changes to update the record instantly.
Yes, attendance can be edited any time before reports are finalized. Simply open the session record, make your changes, and save.
Attendance status directly affects payroll and billing. Marking a student as present or absent helps generate accurate tutor payments and family invoices.
Yes, you can export attendance reports in a spreadsheet format for review, payroll processing, or performance tracking.
Filters let you find records by tutor, student, duration, session type, or attendance status, making it easier to analyze participation trends and performance.