
Team Module User Guide
The Team module helps you manage staff effectively in one place. You can add members, assign roles, control access, and track responsibilities with ease. This guide explains how to keep your team organized and improve overall management.
Step 1: Accessing the Team Module
From the main dashboard sidebar, click Team.
The page lists all employees with key details:
Initials, Full Name, Email
Joined Date, Department, Roles
Pay Rate and Bio
Use the Filters and Sort options to refine and reorder the list.
Switch between All Employees and Deleted Employees views.

Step 2: Using Advanced Filters
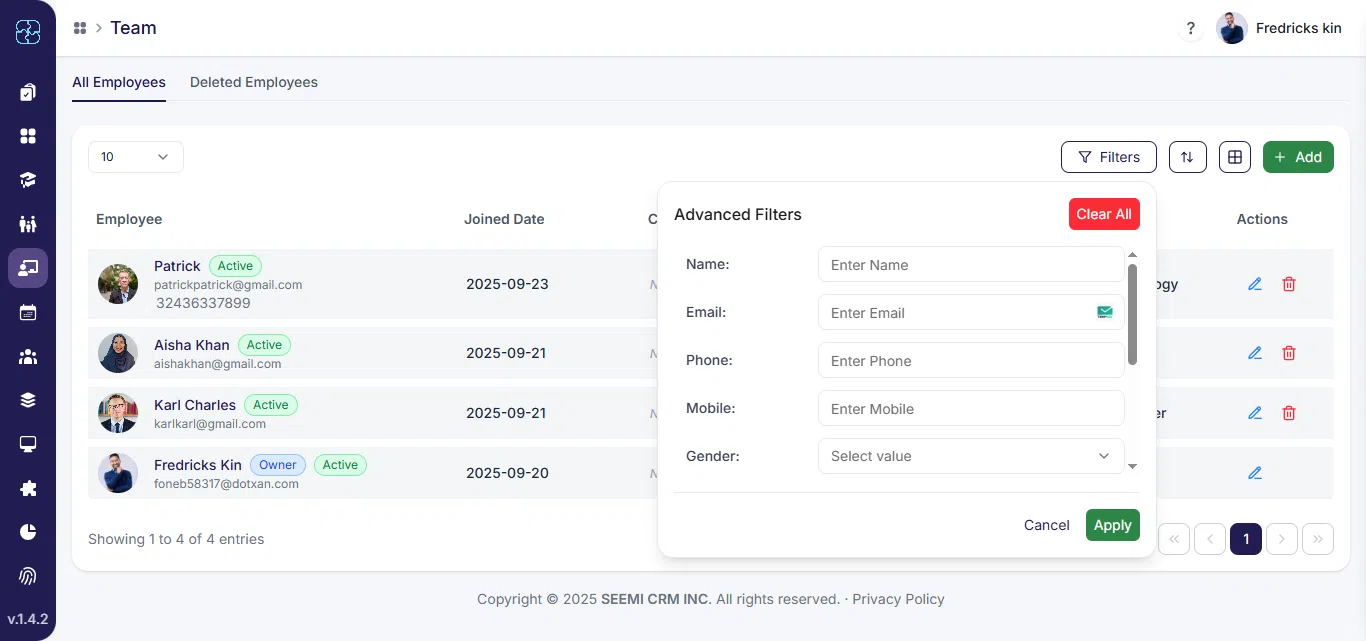
Click Filters to open the filter panel and refine your employee list by:
Name, Email, Phone, Mobile
Gender, Department
Enter criteria and click Apply, use Clear All to reset filters.
Step 3: Sorting Employees
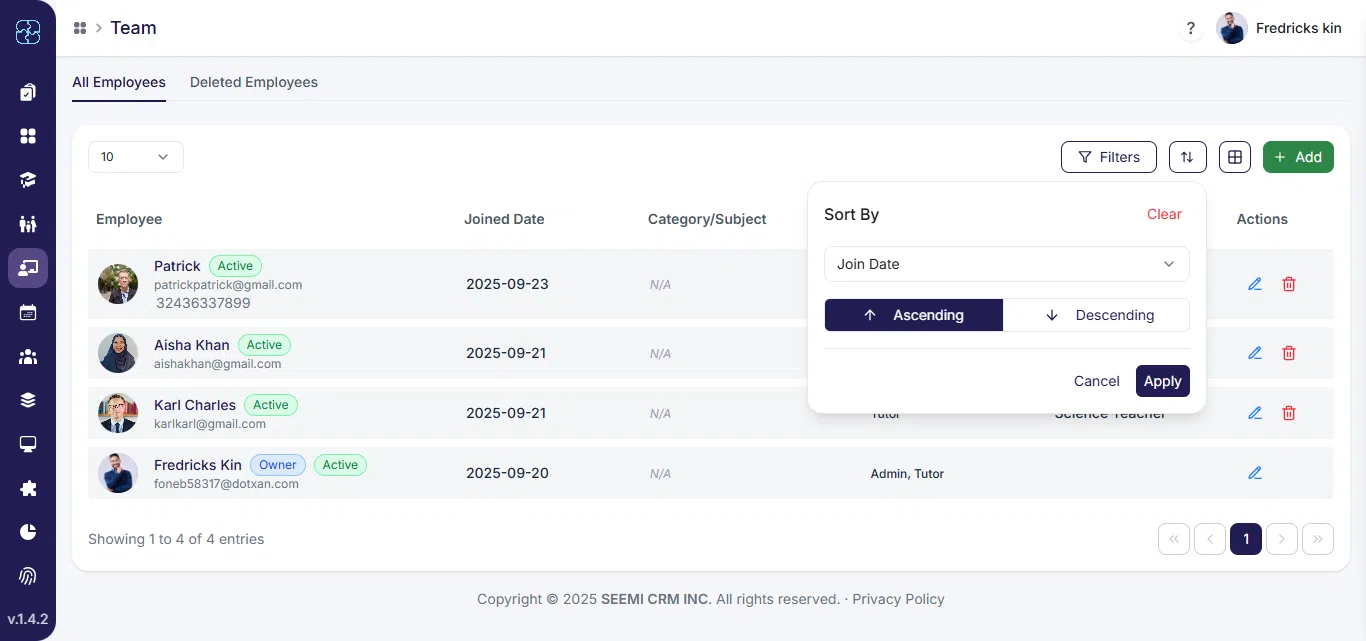
Click Sort, then select a field to sort by (e.g., Name, Joined Date, Department, and Pay Rate).
Choose ascending or descending order.
Click Apply to reorder the list or Clear to remove sorting.
Step 4: Adding a New Employee
Click Add New Employee and fill in:
Full Name and Email Address (required)
Phone and Mobile numbers
Role and Status (e.g., Active)
Payroll type (No automatic payroll, Revenue-based %, Fixed hourly rate)
Gender, Department, Designation
Bio (up to 500 characters)
Click Save to add or Cancel to discard.

Step 5: Viewing and Editing a Team Member Profile
Select an employee to open their profile tabs:
Profile Tab
Displays contact info, gender, DOB, joining date, and bio.
Shows SMS and email reminder preferences.
Manage working hours via Shift Manager (set days, times, and date ranges).
View current Balance, payroll settings and notes.
Editing Profile
Click Edit to update name, email, phone, mobile, gender, DOB, department, designation, roles, and bio.
Enable or disable Send Email Reminders and SMS Enabled.
Save changes with Update or discard with Cancel.

Step 6: Portal Access Management
- In the Portal tab, enable or disable portal access for tutors.
- When enabled, send login info via email.
- Portal access allows tutors to track lessons, study materials, and progress.

Step 7: Payroll Settings
View the current pay rate (e.g., €10/hr).
Click Setup Payroll to configure pay type (hourly rate, fixed, or percentage), effective date, and add payroll notes.
Save or cancel changes.

Step 8: Payroll Transactions
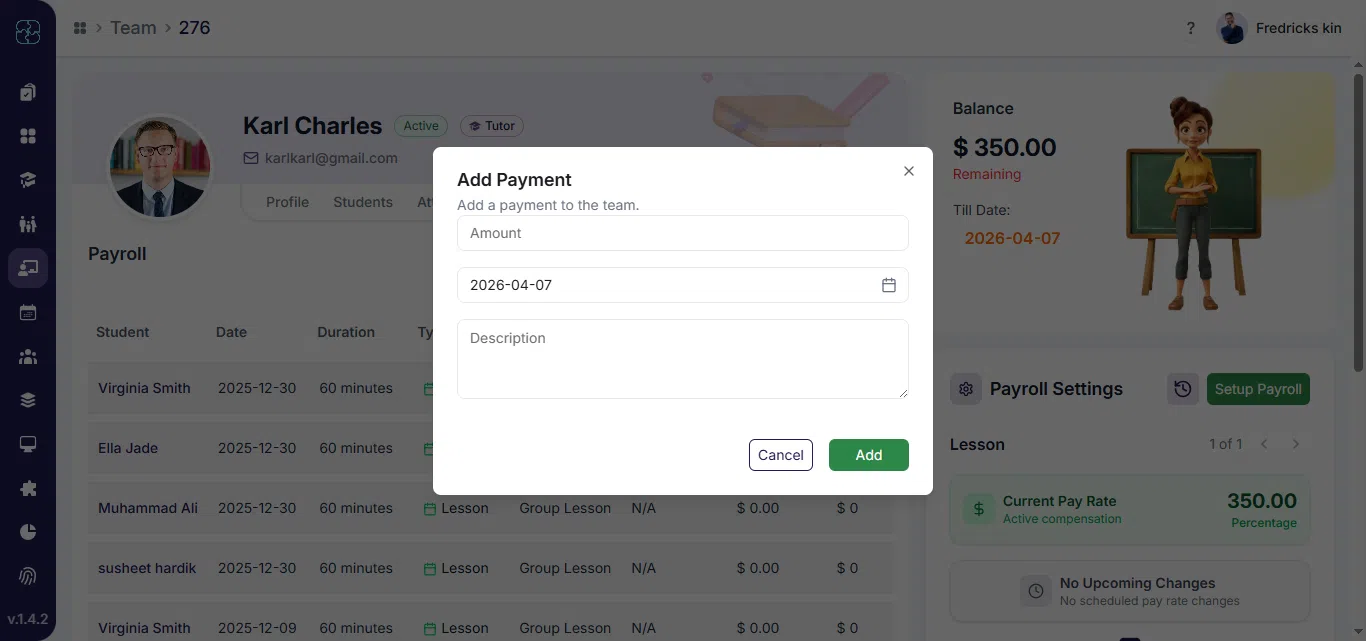
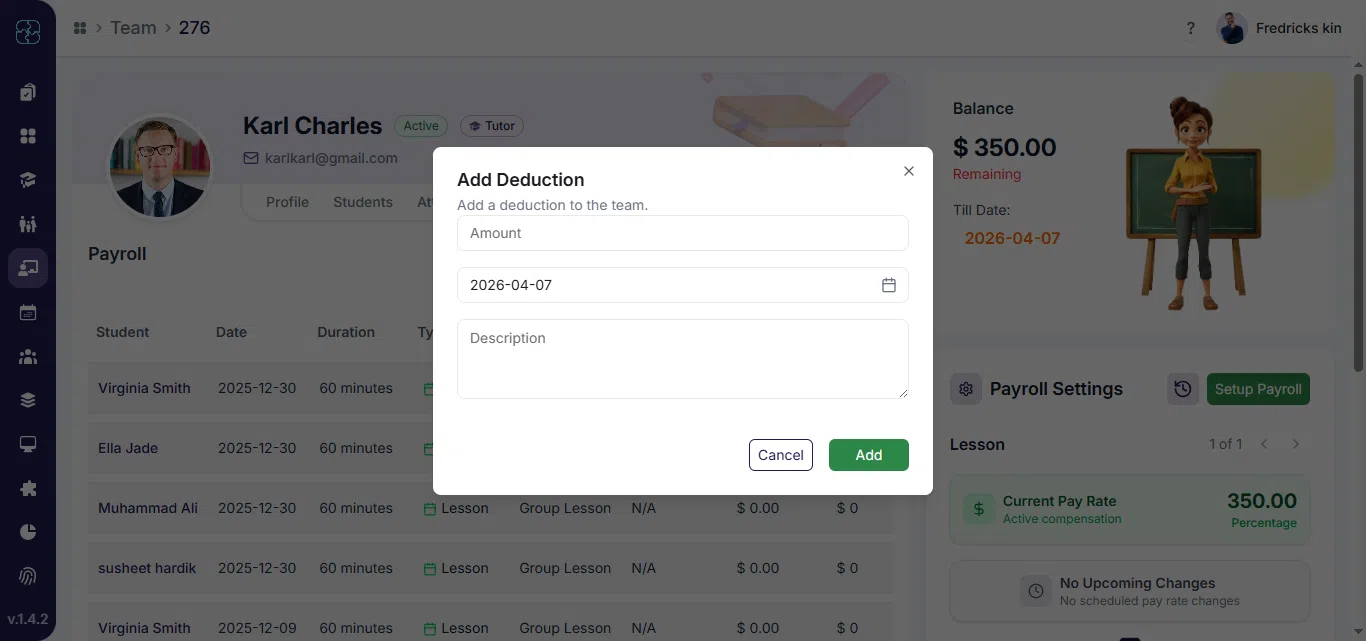
In the Payroll tab, see all financial entries like lessons, earnings, deductions, and payments:
View transaction type, date, duration, pay rate, earned amount, payment, balance, and status.
Add new transactions:
- Add Payment: Record payments.
- Add Earning: Add earnings for work done.
- Add Deduction: Record deductions.

Step 9: Tutor Availability
(Note: Tutor Availability will only appear in a team member’s profile if the Billing Type in your profile is set to Hybrid Calendar + Package Based).

Overview:
In the Tutor Availability tab, manage when tutors are open for booking:
- Buffer Time (minutes): Add a gap between consecutive sessions.
- Start Time Increment: Choose the interval for booking slots (e.g., every 15 or 30 minutes).
- Availability List: View existing availability schedules with dates, times, and booking status.

Set Availability:
To create a new schedule, click Add New and fill in details:
- Days of the Week: Select the days tutors are available.
- Start & End Time: Define daily availability hours.
- Date Range: Set start and end dates for the availability period.
- Notes: Add specific notes about this schedule.
- Platforms: Select the teaching platform (e.g., Zoom).
- Online Booking Toggle: Enable or disable booking for this schedule.
- Save Availability: Click Save to finalize.

Edit or Delete Shift:
- You can delete the shift by clicking on the 3 dots and the popup will show , confirming you ensured.
- You can also edit the shift as well , in case you want make some changes into it.

Tips for Efficient Team Management:
Keep employee records up to date to ensure payroll accuracy.
Use filters and sorting to quickly find team members.
Schedule shifts well in advance to manage workloads effectively.
Monitor payroll transactions regularly to maintain financial accuracy.
Common Questions
The Team module helps you manage all staff in one place. You can add employees, assign roles, update details, manage payroll, and control access easily.
Go to Team → Add New Employee, fill in the required fields, and click Save.
To edit, open an employee’s profile, click Edit, update the information, and click Update to save.
Open the Portal tab in an employee profile and toggle Enable Portal Access on or off. When enabled, tutors automatically receive their login credentials by email.
In the Payroll Settings tab, click Setup Payroll. Choose the pay type (hourly, fixed, or percentage), set the start date, and click Save to confirm.
Open the Payroll tab to view all earnings, deductions, and payments. Click Add New to record a payment, earning, or deduction.
Tutor Availability is visible when your billing type is Hybrid (Calendar + Package). You can set days, times, buffer gaps, and meeting platforms. Use Add New to create or edit schedules.