
How to Change Timezone
Step 1: Log into Your Account
Open Seemi CRM and log into your account.
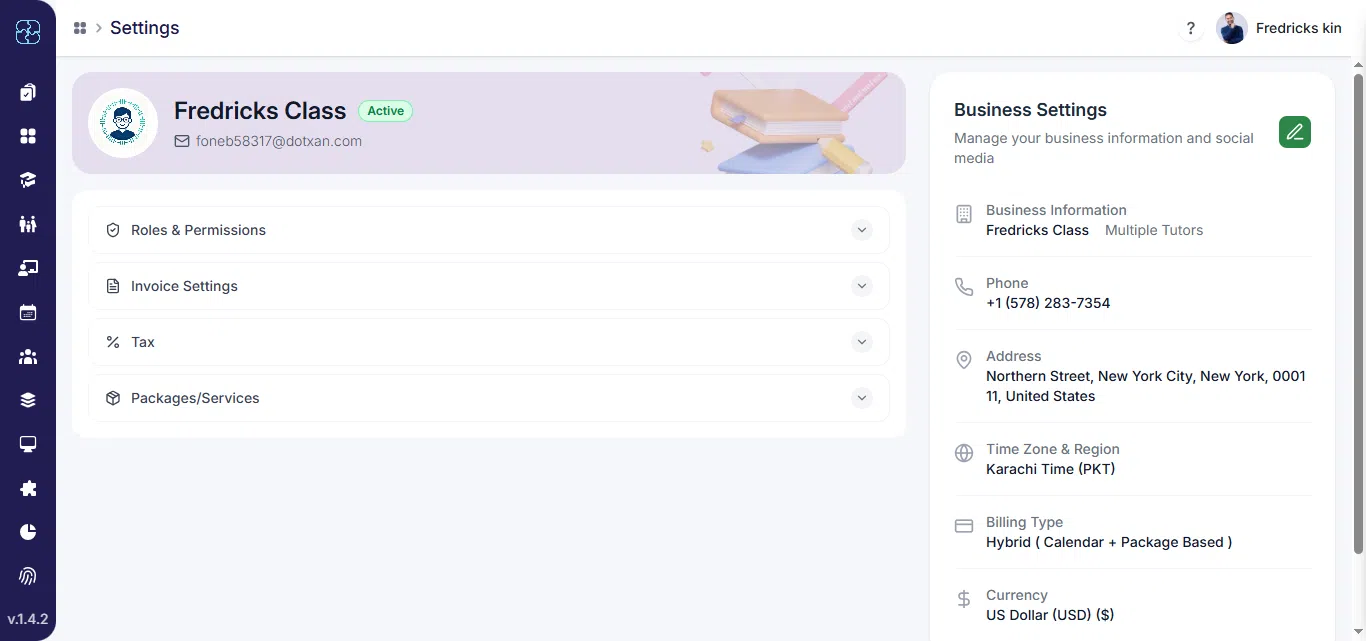
Click on your profile icon in the top-right corner of the screen.
- Select Settings from the drop down menu.

Step 2: Edit Business Profile
On the Settings page, look to the right under Business Settings.
Click the edit (pencil) icon next to your business information.
Step 3: Change Timezone
In the modal window, find the Time zone drop down (marked with a red asterisk
*).Click the drop down and select your correct time zone (e.g., Pacific Time (PT), Mountains Time (MT), etc.).

Step 4: Save Changes
After selecting the new Timezone, click the Update Profile button at the bottom right of the modal.
Common Questions
Log into your account, click on your profile icon, and select Settings. Under Business Settings, click the edit icon next to your business information. Choose your correct time zone from the dropdown and click Update Profile to save it.
Setting the right time zone ensures that all your classes, invoices, and notifications appear at the correct local time for both tutors and students.
Yes. You can change your time zone at any time through the Business Settings section, and the update will take effect immediately across your account.
Once you update it, your calendar events, reminders, and billing schedules will automatically adjust to match your selected time zone.
If your time zone does not save, make sure to click Update Profile after selecting it. If the issue continues, refresh the page or contact support for assistance.