The Website Widgets feature allows you to add custom widgets to your website and sync all collected data directly to your Seemi dashboard. You can collect student signups, prospect leads, and lesson bookings without manual data entry.
Step 1: Open the Widgets Module
Log in to your Seemi dashboard.
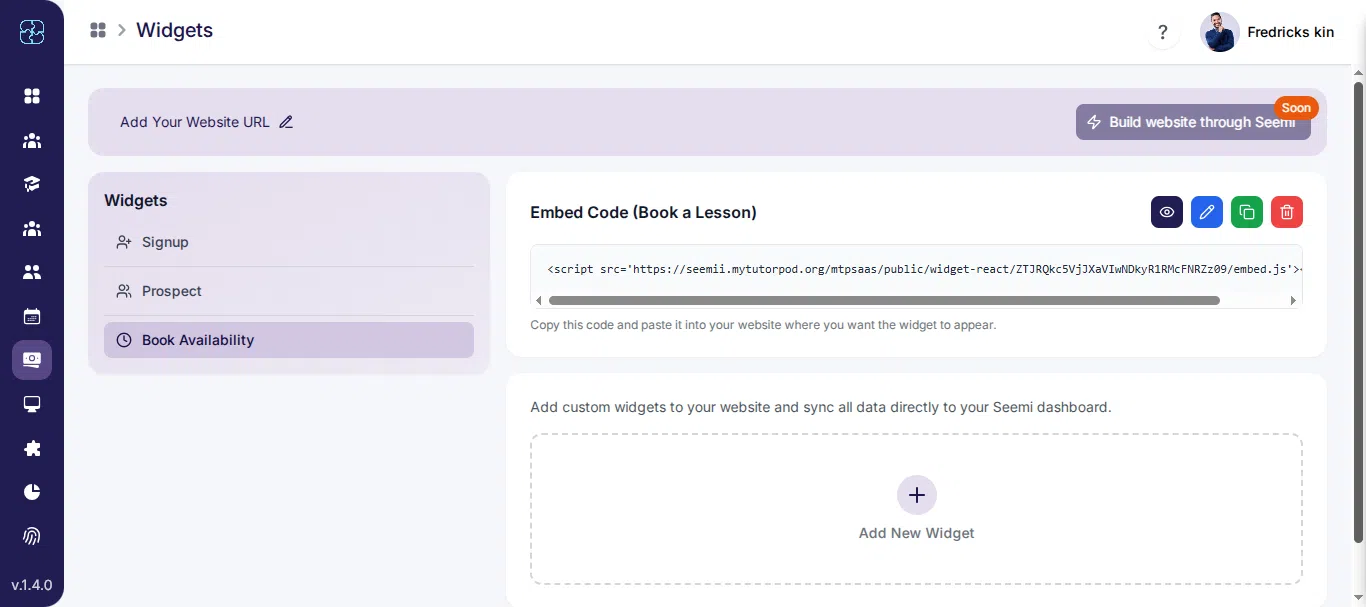
From the left sidebar, click Widgets.
You will see the message: Add custom widgets to your website and sync all data directly to your Seemi dashboard.
Step 2: Select Widget Type and Create Widget
On the Widgets page, Seemi displays three widget types:
Signup
Prospect
Book Availability
First, select the widget type you want to create. After selecting the widget type, click Add New Widget to create that widget.
Example: If you select Signup, clicking Add New Widget will open the Signup widget setup.
Signup Widget Setup
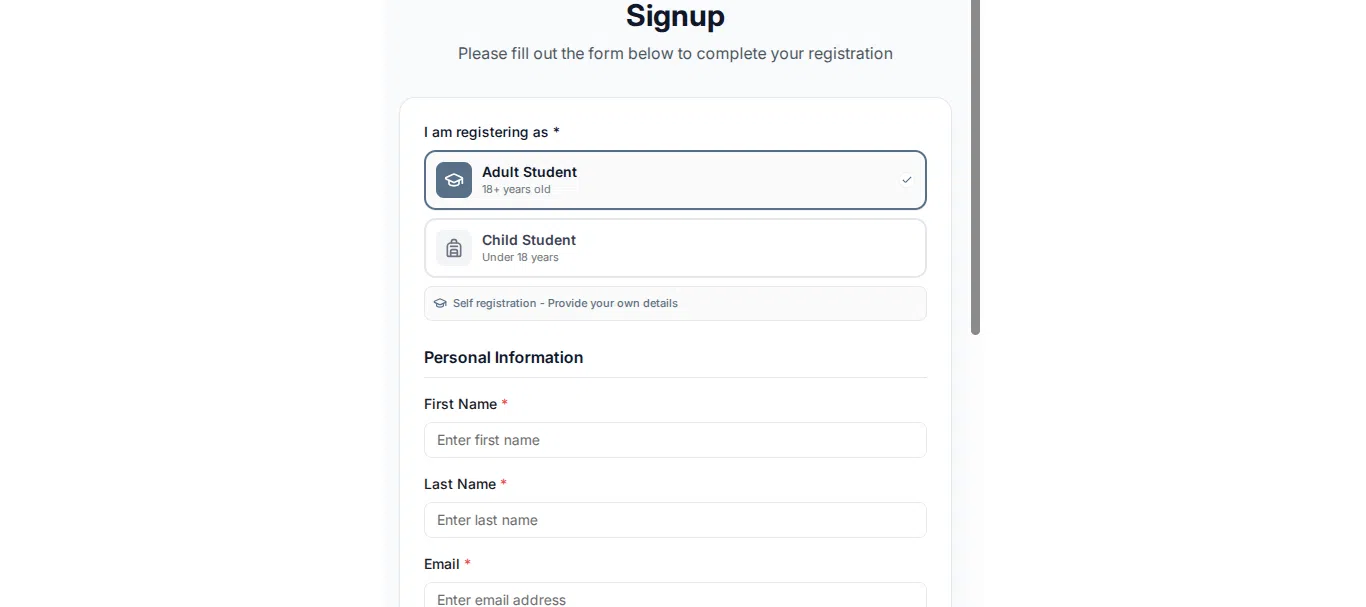
The Signup widget allows students or parents to register from your website.
Step 3: Configure Signup Widget
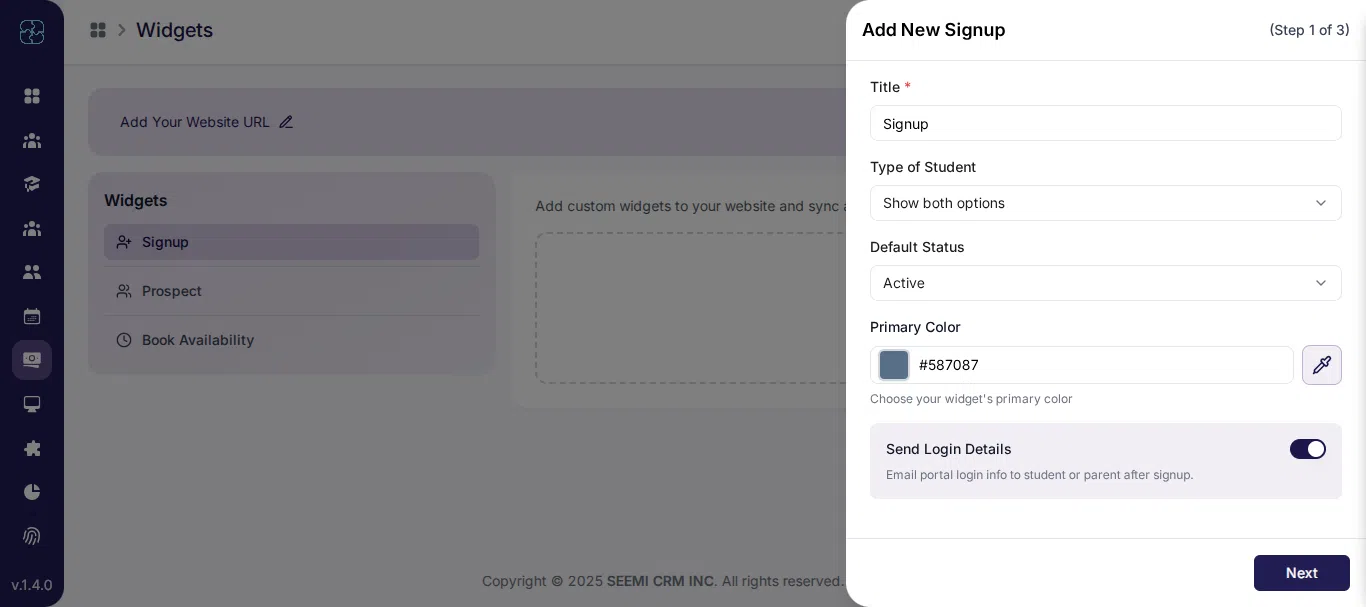
Step 3.1: Basic Information
Fill in the following fields:
Title: Signup
Type of Student: Show both options
Default Status: Active
Primary Color: Choose your brand color
Send Login Details: Enable to email portal login details after signup
Click Next.
Step 3.2: Additional Information
The signup form includes basic fields by default.
Use More Fields to add extra fields.
Select which fields are Required and which are Optional.
Click Next.
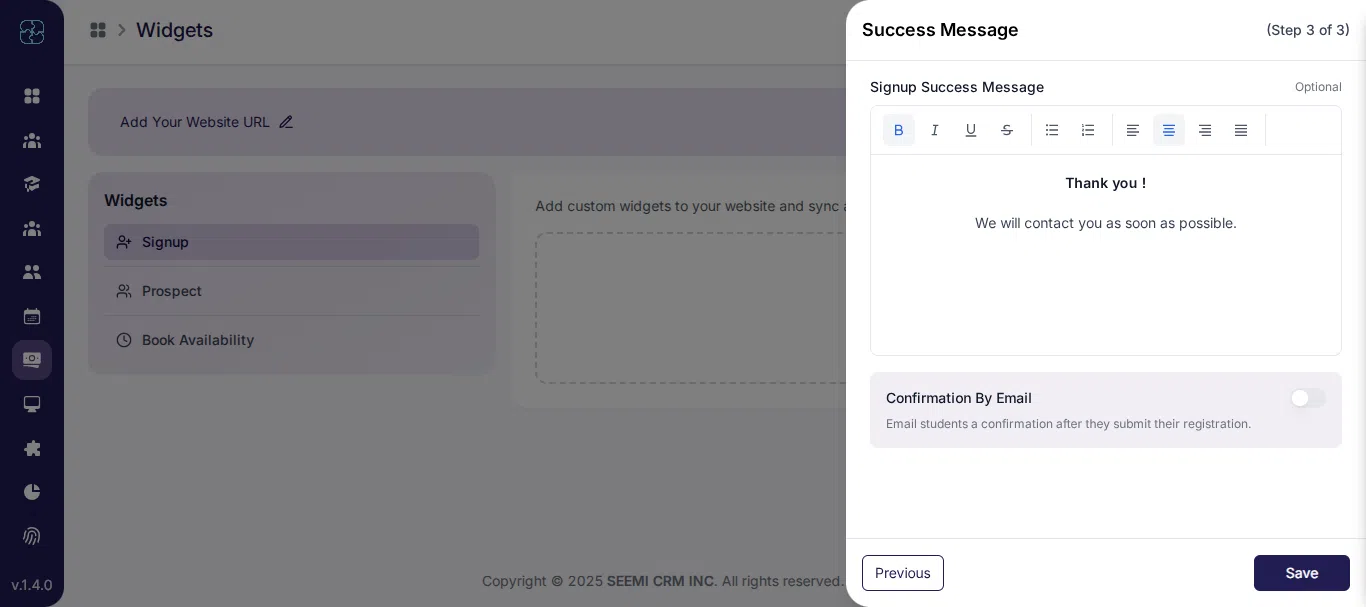
Step 3.3: Success Message
Add a Signup Success Message, for example: Thank you. We will contact you as soon as possible.
Enable Confirmation by Email to send confirmation after signup.
Click Save.
Step 3.4: Use Signup Widget on Your Website
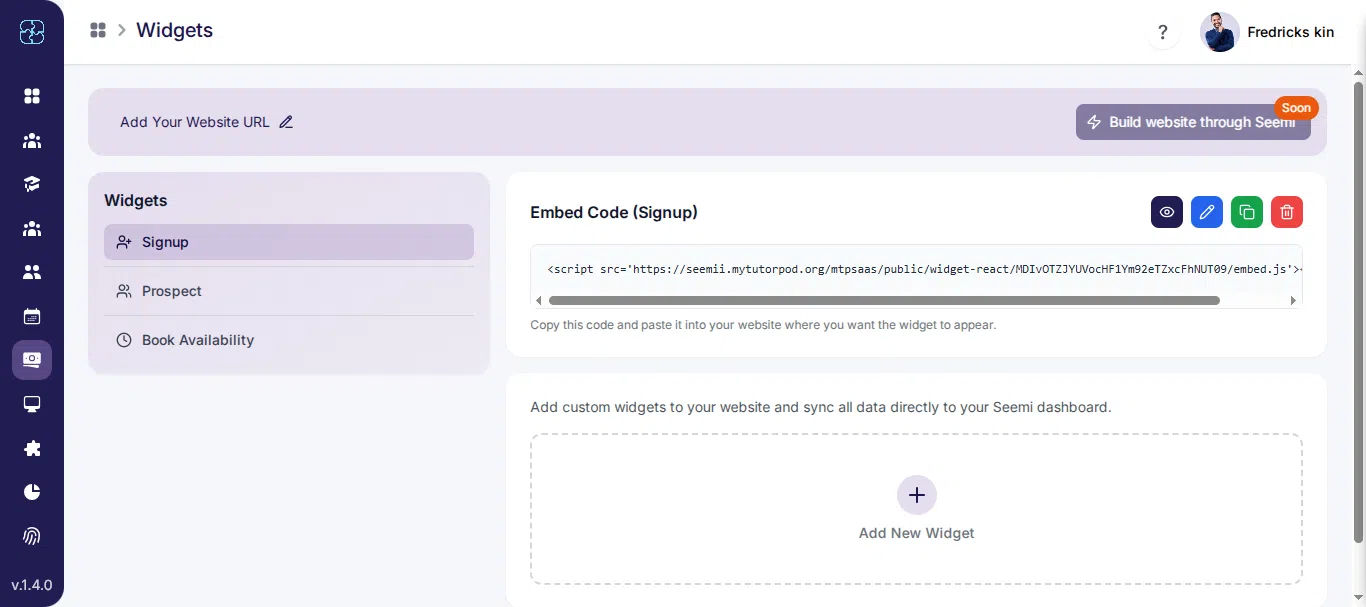
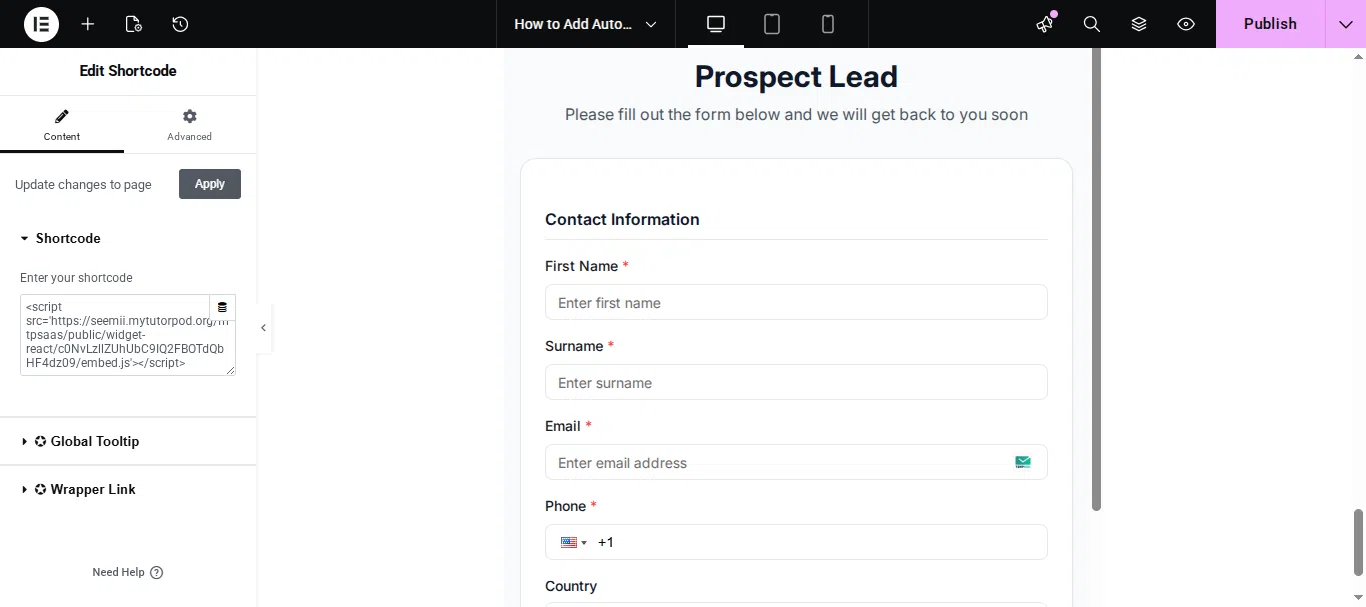
After saving the Signup widget, Seemi provides an embed code.
Copy the Code
Open the Signup widget.
Click Copy Code.
Paste on Your Website
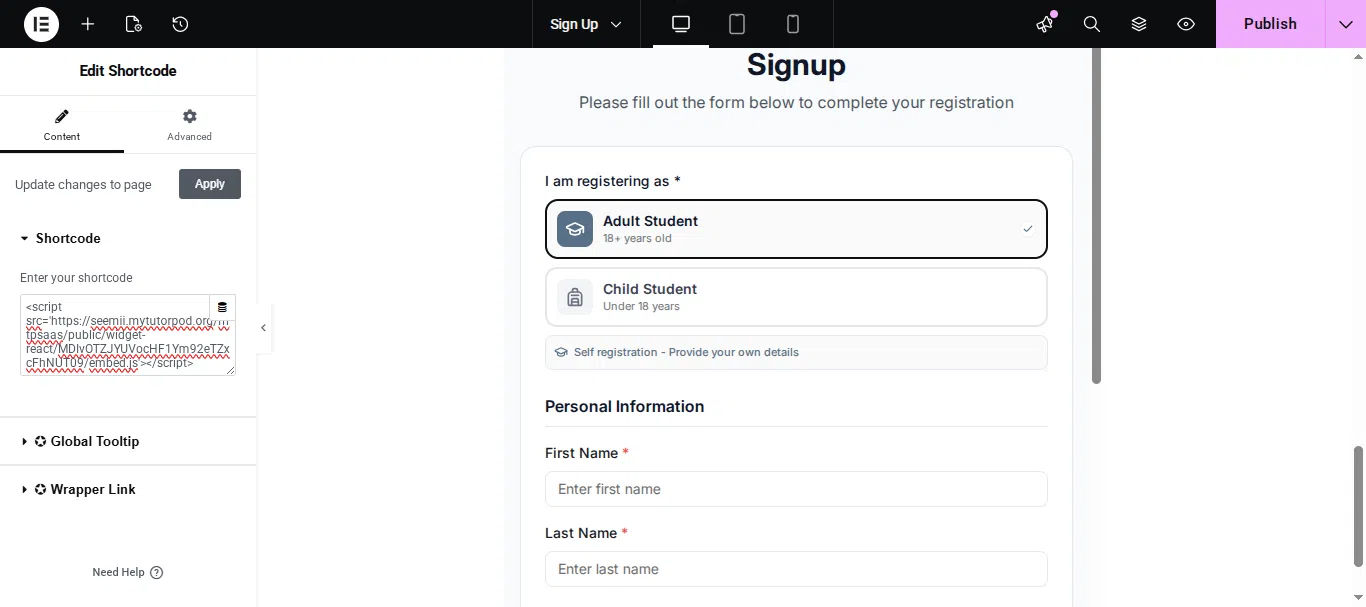
Add a Custom HTML or Embed block in your website editor.
Paste the code and save or publish the page.
Check the Widget
Open the page to confirm the Signup widget is visible.
Submit a test signup to ensure data syncs to your Seemi dashboard.
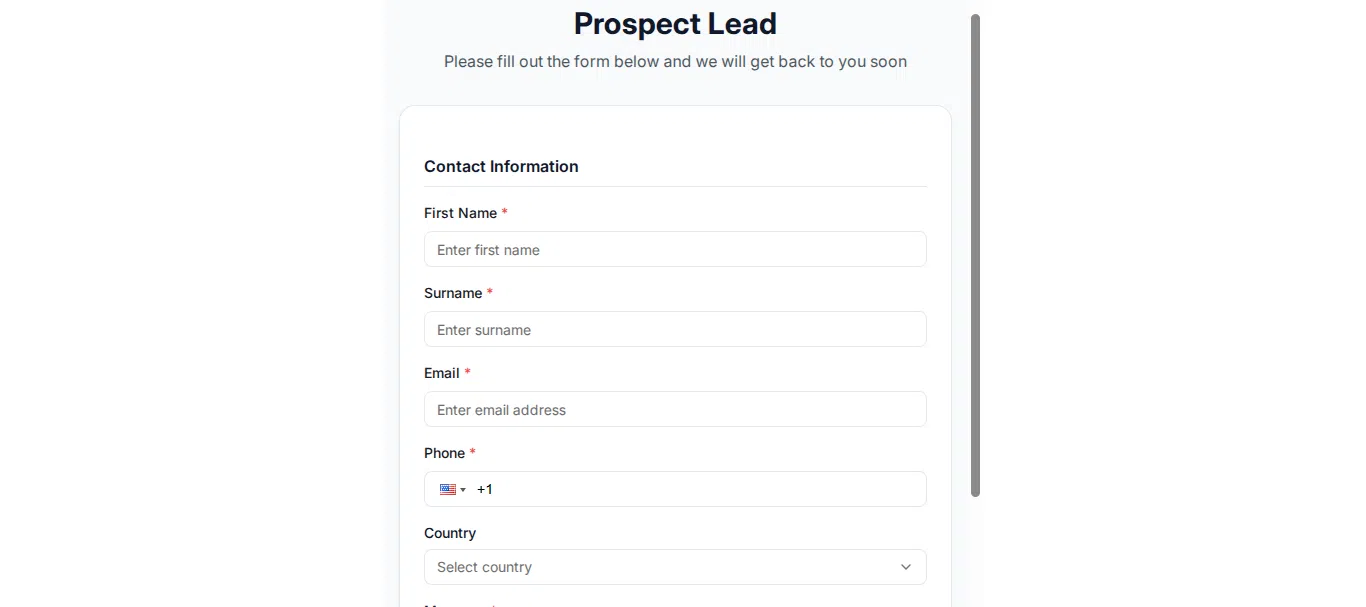
Prospect Widget Setup
The Prospect widget is used to capture leads and inquiries.
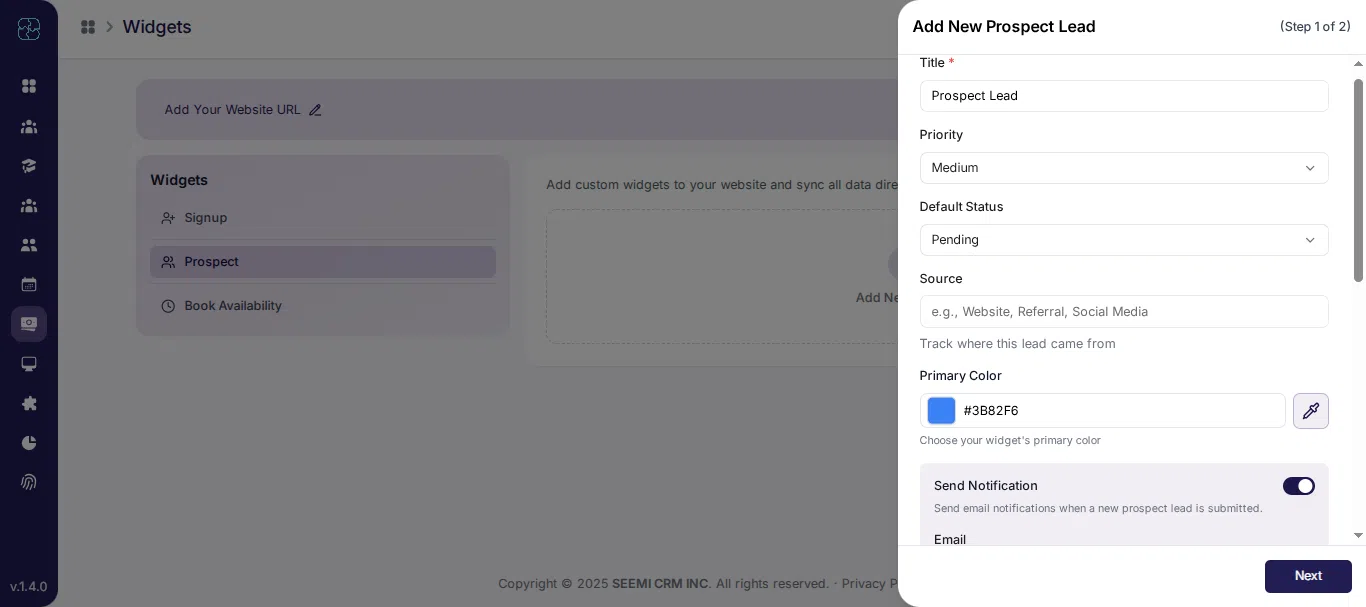
Step 4: Configure Prospect Widget
Step 4.1: Basic Information
Fill in the following:
Title: Prospect Lead
Priority: Medium
Default Status: Pending
Source: Website, Referral, Social Media
Primary Color: Choose widget color
Click Next.
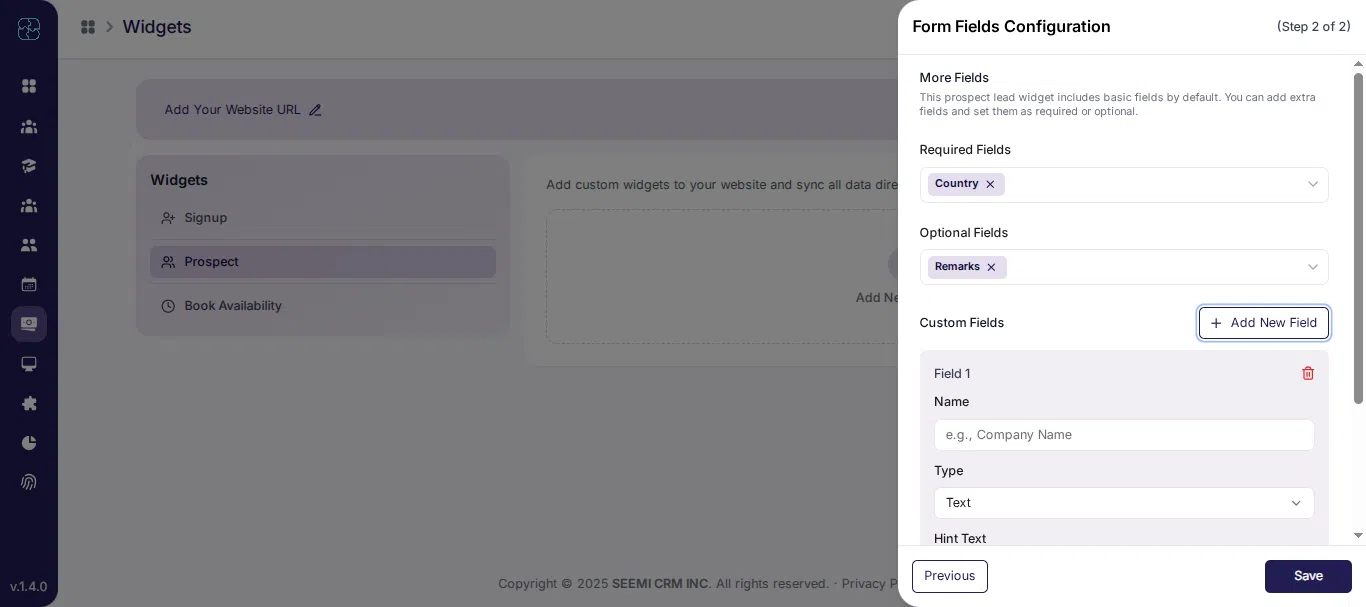
Step 4.2: Form Fields Configuration
Basic fields are included by default.
Add extra fields using More Fields.
Choose Required Fields and Optional Fields.
Use Add New Field to create custom fields if needed.
Click Save.
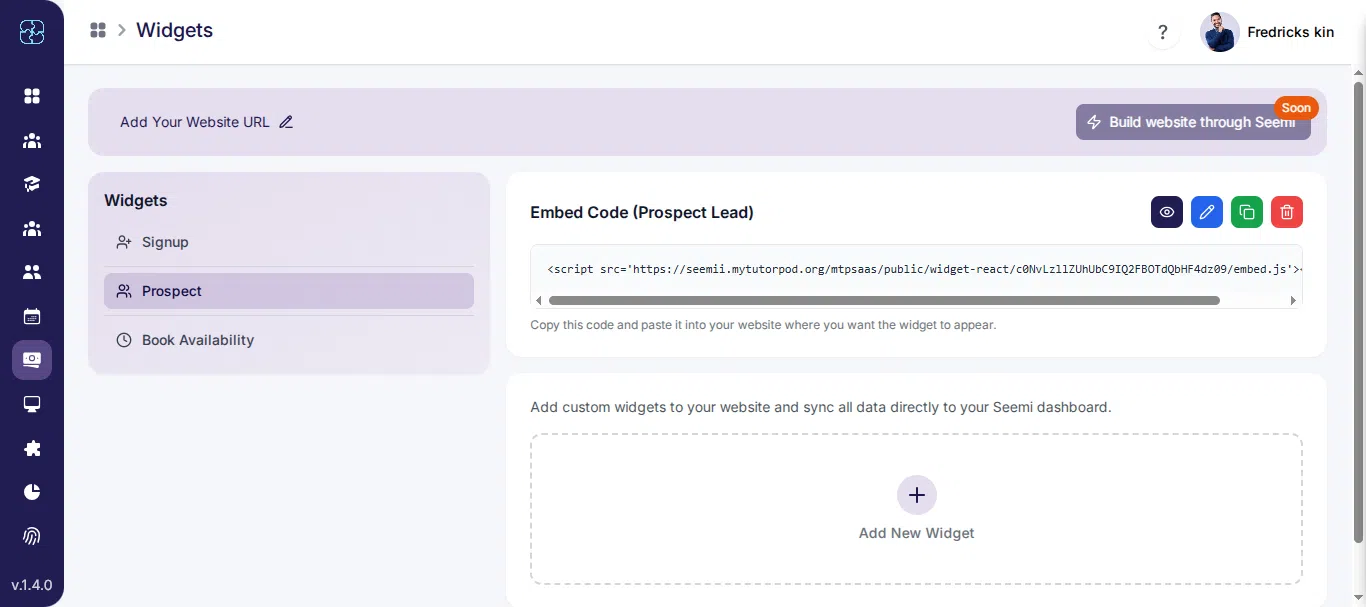
Step 4.3 : Use Prospect Widget on Your Website
After saving the Prospect widget, Seemi provides an embed code.
Copy the Code
Open the Prospect widget and Click Copy Code.
Paste on Your Website
Add a Custom HTML or Embed block to your website page editor.
Paste the code and save/publish the page.
Check the Widget
Open the page to confirm the Prospect widget is visible.
Submit a test lead and verify it appears under Leads in Seemi CRM dashboard.
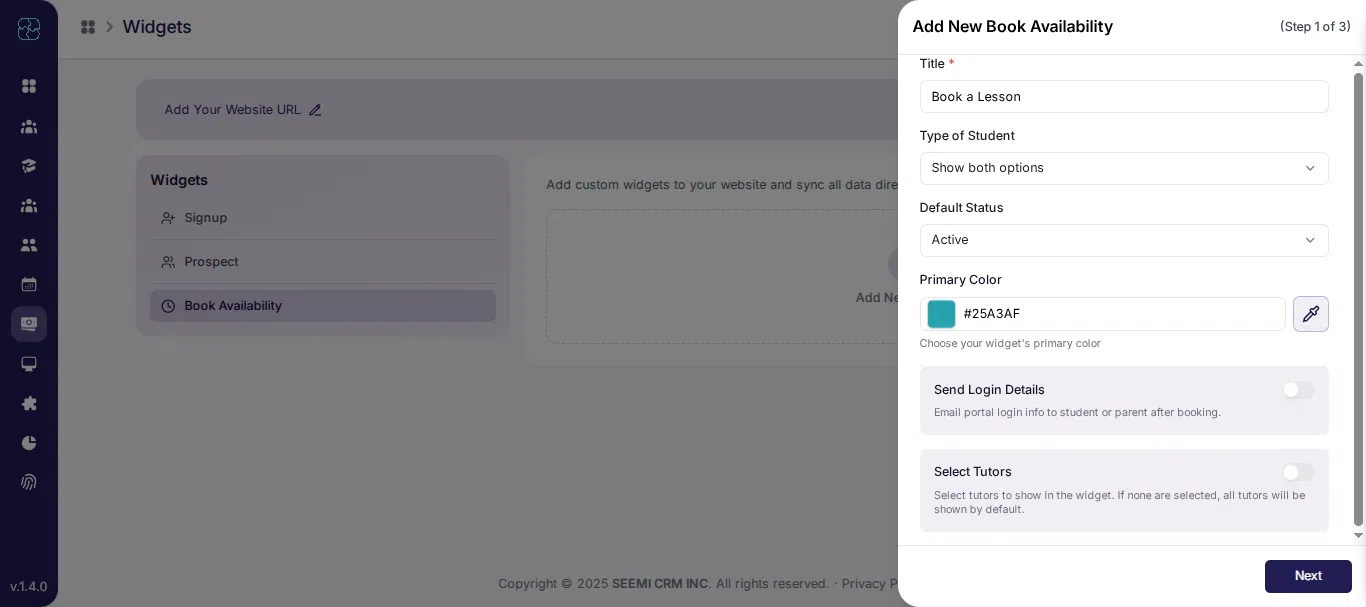
Book Availability Widget Setup
The Book Availability widget allows users to book lessons online.
Step 5: Configure Book Availability Widget
Step 5.1: Basic Information
Fill in the following:
Title: Book a Lesson
Type of Student: Show both options
Default Status: Active
Primary Color: Choose widget color
Send Login Details: Enable if required
Select Tutors: Choose available tutors
Click Next.
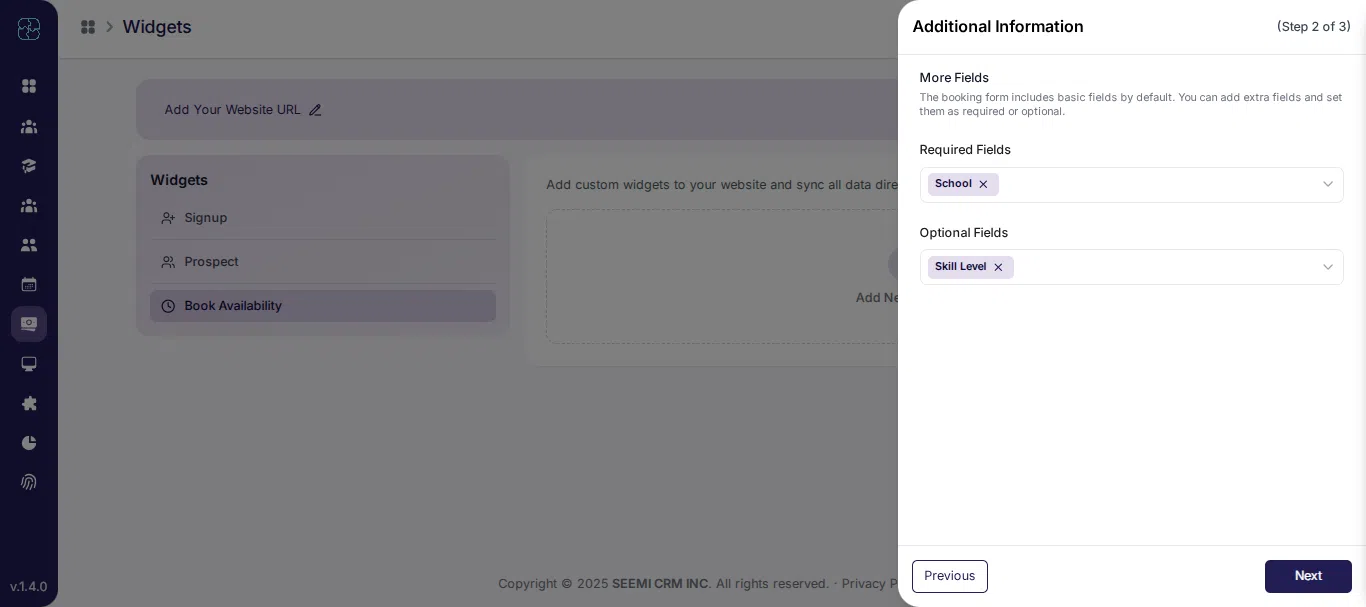
Step 5.2: Additional Information
The booking form includes basic fields by default.
Add more fields if needed.
Set fields as Required or Optional.
Click Next.
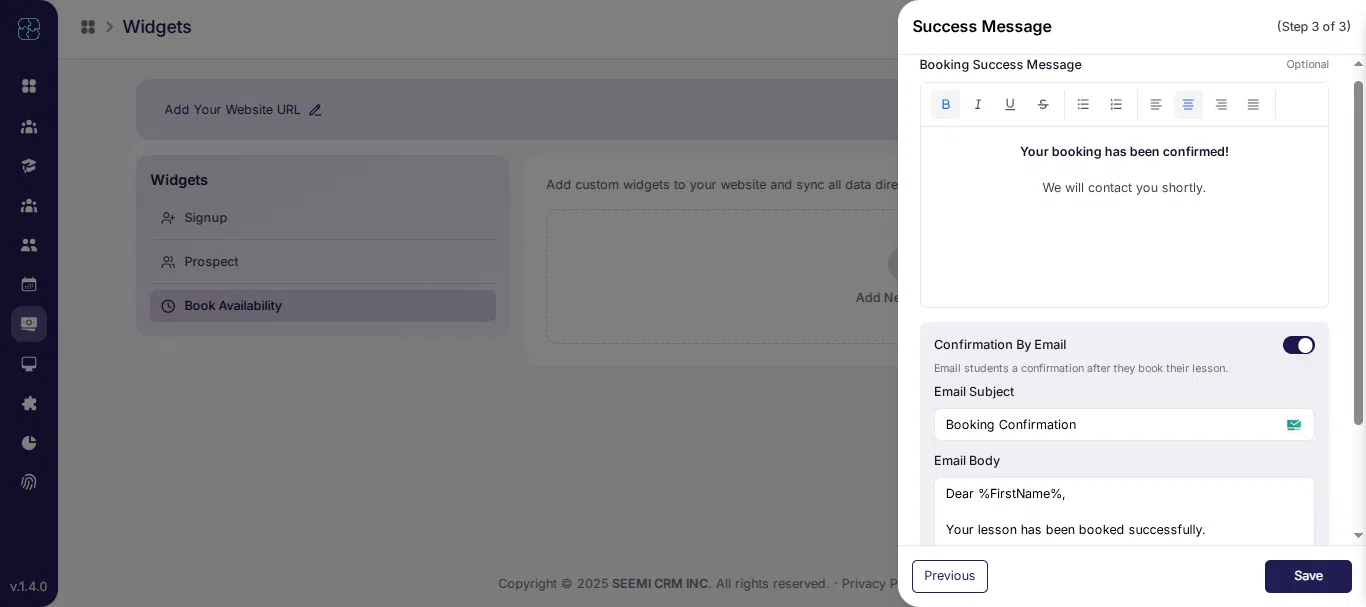
Step 5.3: Success Message
Add a Booking Success Message, for example: Your booking has been confirmed. We will contact you shortly.
Enable Confirmation by Email.
Customize:
Email Subject: Booking Confirmation
Email Body: Dear %FirstName%, Your lesson has been booked successfully. Thank you, %BusinessName%
Click Save.
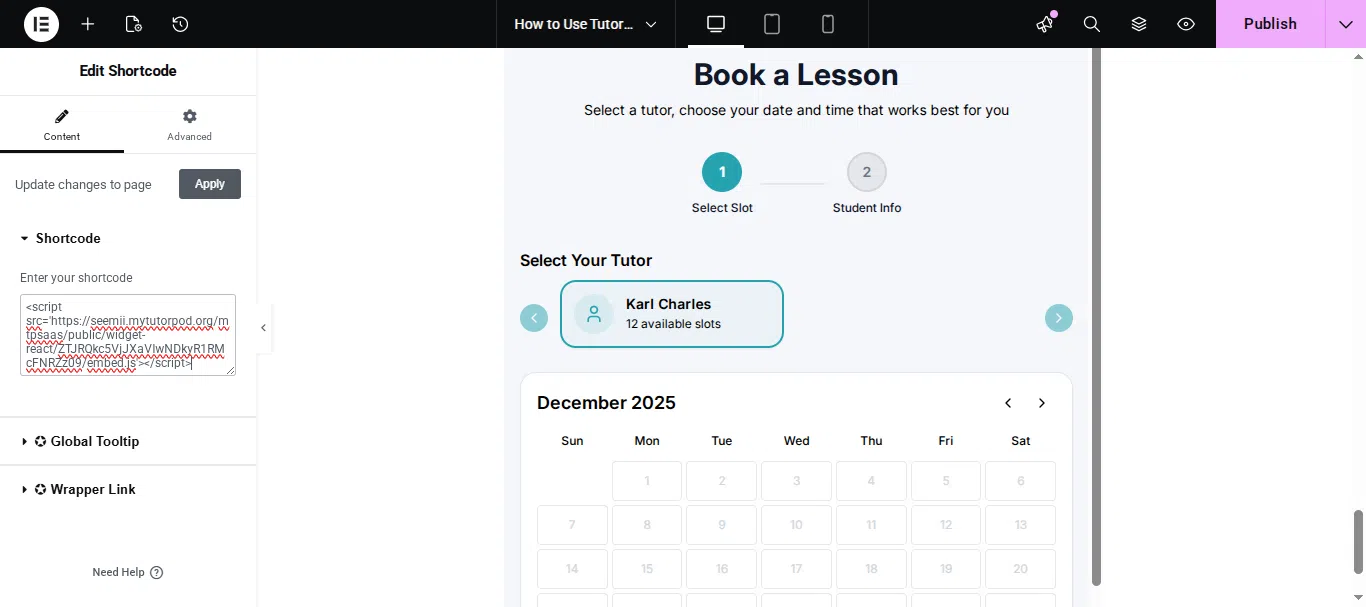
Step 5.4: Use Book Availability Widget on Your Website
After saving the Book Availability widget, Seemi provides an embed code.
Copy the Code
Open the Book Availability widget.
Click Copy Code.
Paste on Your Website
Add a Custom HTML or Embed block to your website.
Paste the code and publish the page.
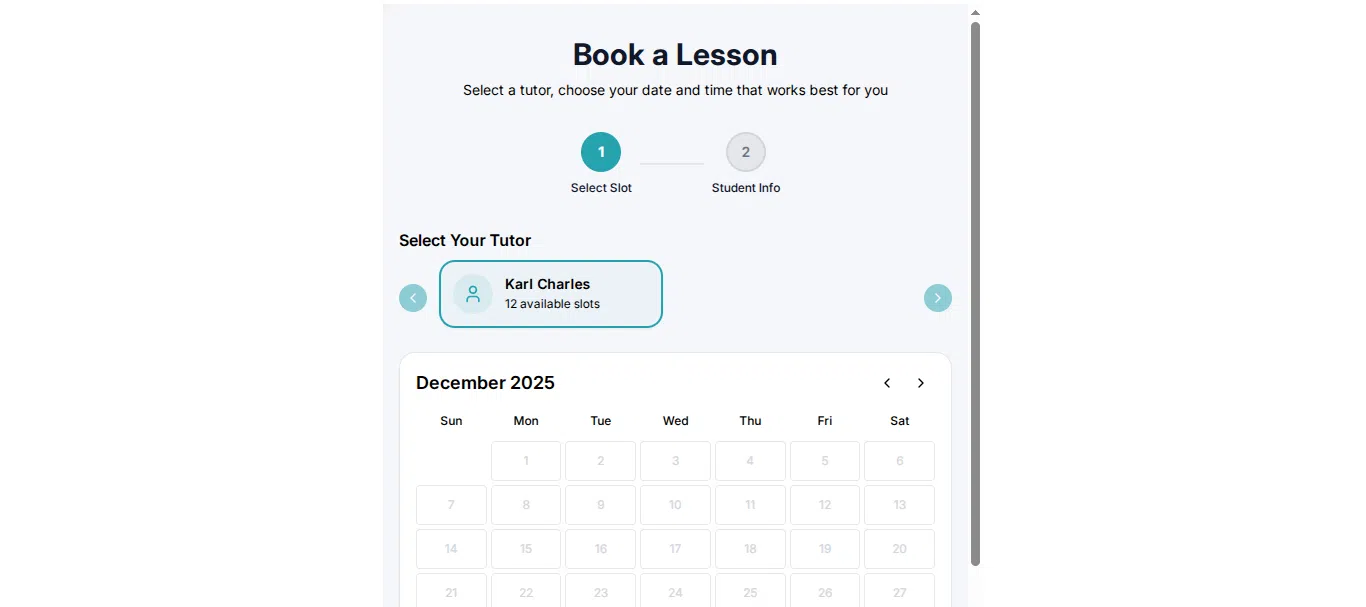
Check the Widget
Open the page to confirm the booking widget is visible.
Submit a test booking and verify it appears in Calendar and Bookings.
What Happens After Submission
Signup data appears in student records
Prospect data appears under leads
Booking requests appear in calendar and bookings
Common Questions
What are website widgets in Seemi?
Website widgets allow you to collect student signups, prospect leads, and lesson bookings directly from your website and sync all data to your Seemi dashboard automatically.
Which widget types are available in Seemi?
Seemi provides three widget types: Signup widget, Prospect lead widget, and Book Availability widget, each designed for a specific data collection purpose.
How do I add a Seemi widget to my website?
After creating a widget, copy the embed code and paste it into a Custom HTML or Embed block on your website page, then publish the page.
Can I customize fields in Seemi website widgets?
Yes, you can add extra fields, mark them as required or optional, and create custom fields depending on the widget type.
Where does widget data appear after submission?
Signup data appears in student records, prospect data appears in leads, and booking data appears in the bookings section.
Do Seemi widgets send confirmation emails?
Yes, signup and booking widgets can send automatic confirmation emails after form submission.